


Sewing, Sewing Tutorials
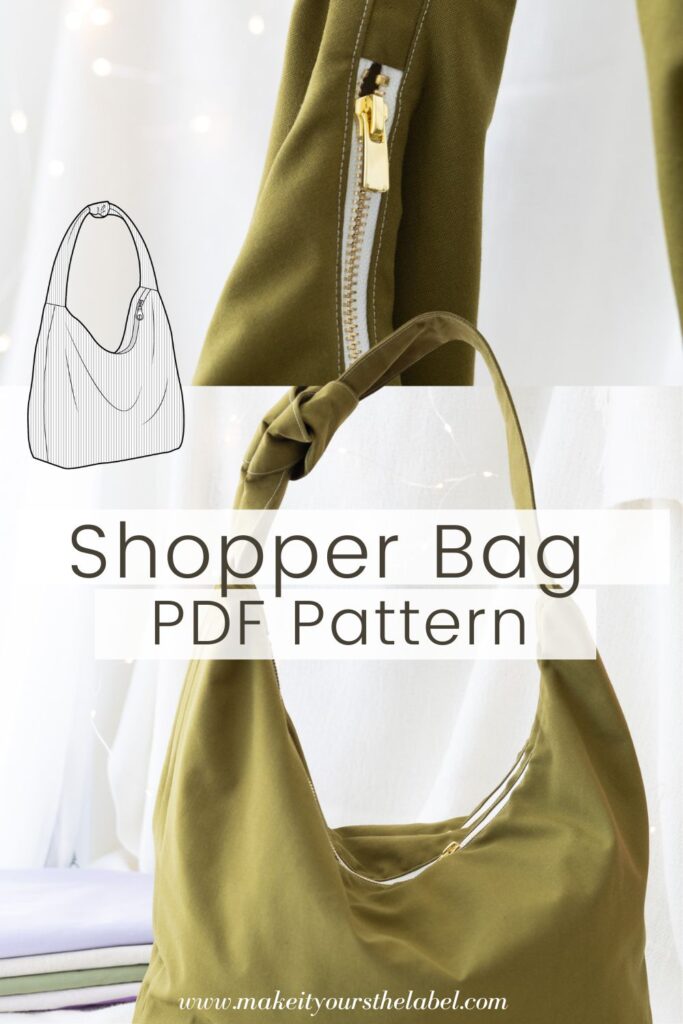
DIY Shopper Bag: make your own zipper tote bag with this easy PDF Sewing Pattern
**Klick hier für die deutsche Version**Click here for the German version**
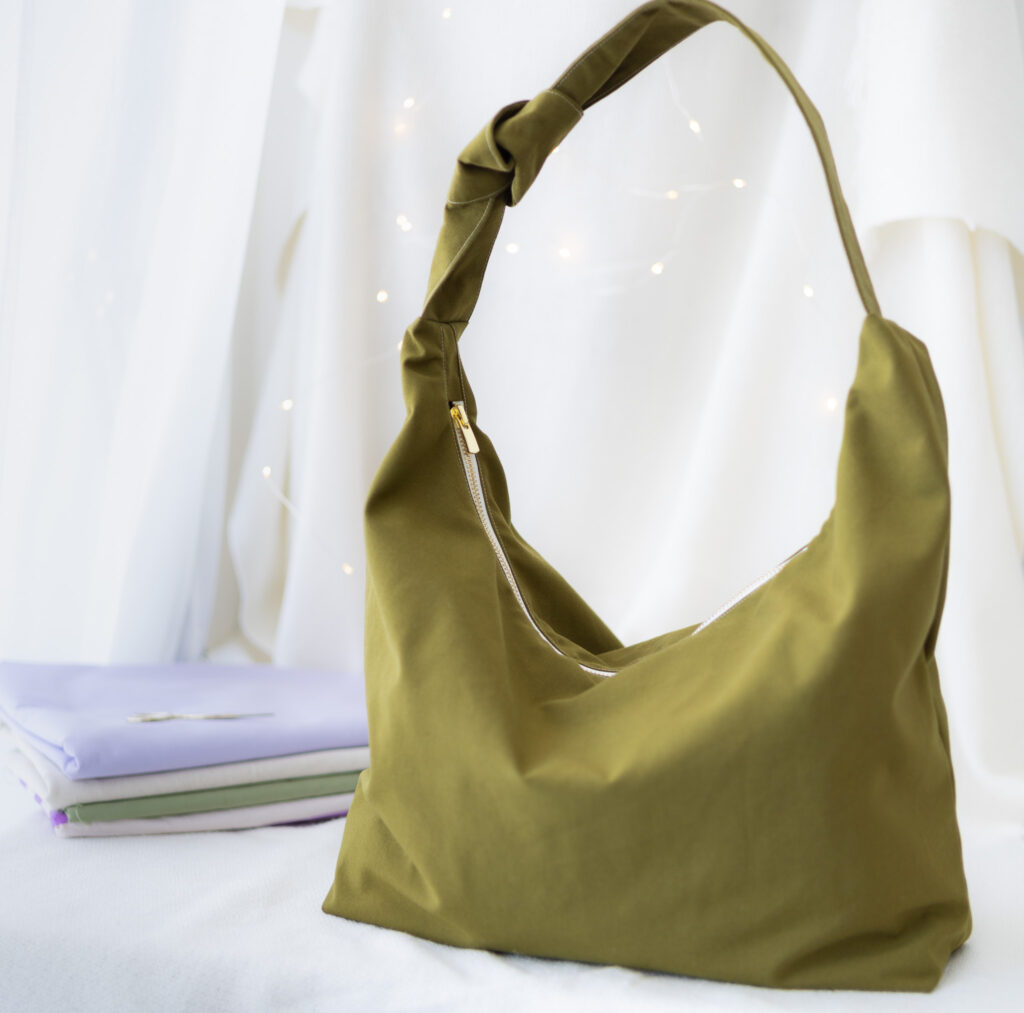
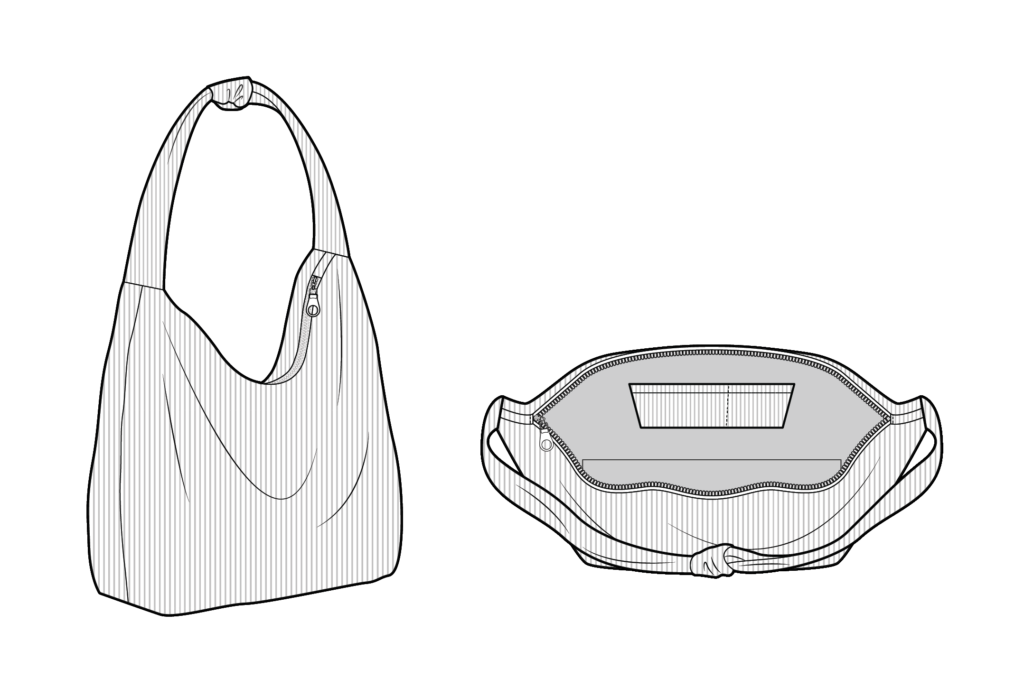
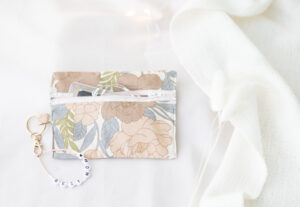
Are you looking for a stylish and functional shopper bag to add to your wardrobe? Look no further than this knotted tote bag. After making the first prototype of this bag sewing pattern I knew this has the potential to be my new favorite pattern!
The beauty of this shopper bag pattern is its size and functionality. It’s the perfect size for everyday use, whether you’re going to work or out shopping. The bag has enough space to fit your laptop, including a MacBook Pro, and still have room for other essentials such as notebooks, books, and even a water bottle. The small pocket included in the design is perfect for storing your phone or keys, keeping them safe and easy to access. And with the added security of a zipper closure, you can rest assured that everything inside the bag is secure and protected.
One of the best things about the knot bag pattern is that it’s available for instant download, so you can start sewing right away! Whether you’re a seasoned sewer or just starting out, the zipper bag pattern is an excellent choice for anyone looking to create a high-quality, stylish bag that’s uniquely their own. So why wait? Grab your knot bag PDF and get started on making your own one-of-a-kind shopper bag today!
Are you new to sewing and prefer to practice zippers with a free pattern? Then this free zipper pouch is the perfect project to get started!
*Please note that some of the links in this post are partner links (affiliate links), which means I may earn a small commission if you make a purchase through them – at no extra cost to you. I only recommend products and services I love and trust, and the affiliate links help me to keep creating helpful content like this. Thank you for supporting my blog!*
Materials and Supplies Needed to Make Your Shopper Bag
Material
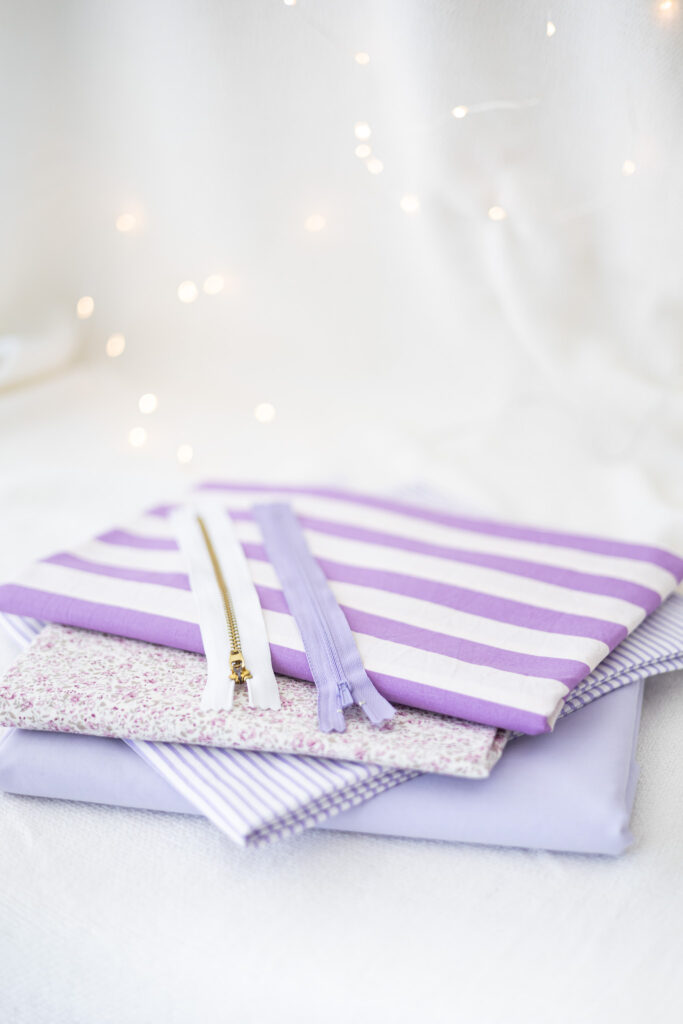
- 1 m / 40″ main fabric* (woven, e.g. cotton* or synthetic canvas*, (faux) leather*)
- 1 m / 40″ lining (light cotton, e.g. Popeline* or synthetic)
-
41 cm / 16″ zipper* My recommendation: metal zipper, Option to use a non-separating nylon coil zipper or any other zipper
- Optional: fusible interfacing* to give your bag more stability e.g. for the strap and front part. This is a design decision and depends on your choice of fabric.
- Universal sewing needles*
- Thread matching your fabric
- Fabric Scissors, fabric pins, iron
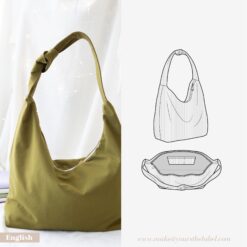
PDF Sewing Pattern
Choosing the Right Fabric for Your Shopper Bag
- Canvas* – this is a durable and sturdy fabric that can withstand heavy use and weight.
- (faux) Leather* or leather – these fabrics can give your bag a more sophisticated and elegant look.
- Corduroy* – this fabric is soft and comfortable, yet still sturdy enough to hold the weight of your belongings.
- Denim* – this fabric is thick and sturdy, making it perfect for a more rugged-looking bag.
- Upholstery fabric* – this type of fabric is typically thicker and more durable, and can be a great option if you want a more unique and textured look for your bag.
Remember to choose a fabric that is appropriate for your skill level and the specific design of your bag. Additionally, be sure to pre-wash and iron your fabric before starting to sew to avoid any shrinkage or distortion after sewing.
Shopper Bag Sewing Tutorial on YouTube
(In German with English subtitles)
How to turn on subtitles for this YouTube Video:
Click on the “CC” button located at the bottom right corner of the video player. If you don’t see the “CC” button, click on the “Settings” icon and select “Subtitles/CC” from the drop-down menu. You should now see the available subtitle options for the video. Click on the language you want to use, and the subtitles should appear on the video player.
You can customize the appearance of the subtitles by clicking on the “Settings” icon and selecting “Subtitles/CC” > “Options.” From there, you can change the font size, color, and background color of the subtitles.
That’s it! Now you can enjoy the video with subtitles 🙂
Step-by-Step Guide to Sewing Your Shopper Bag
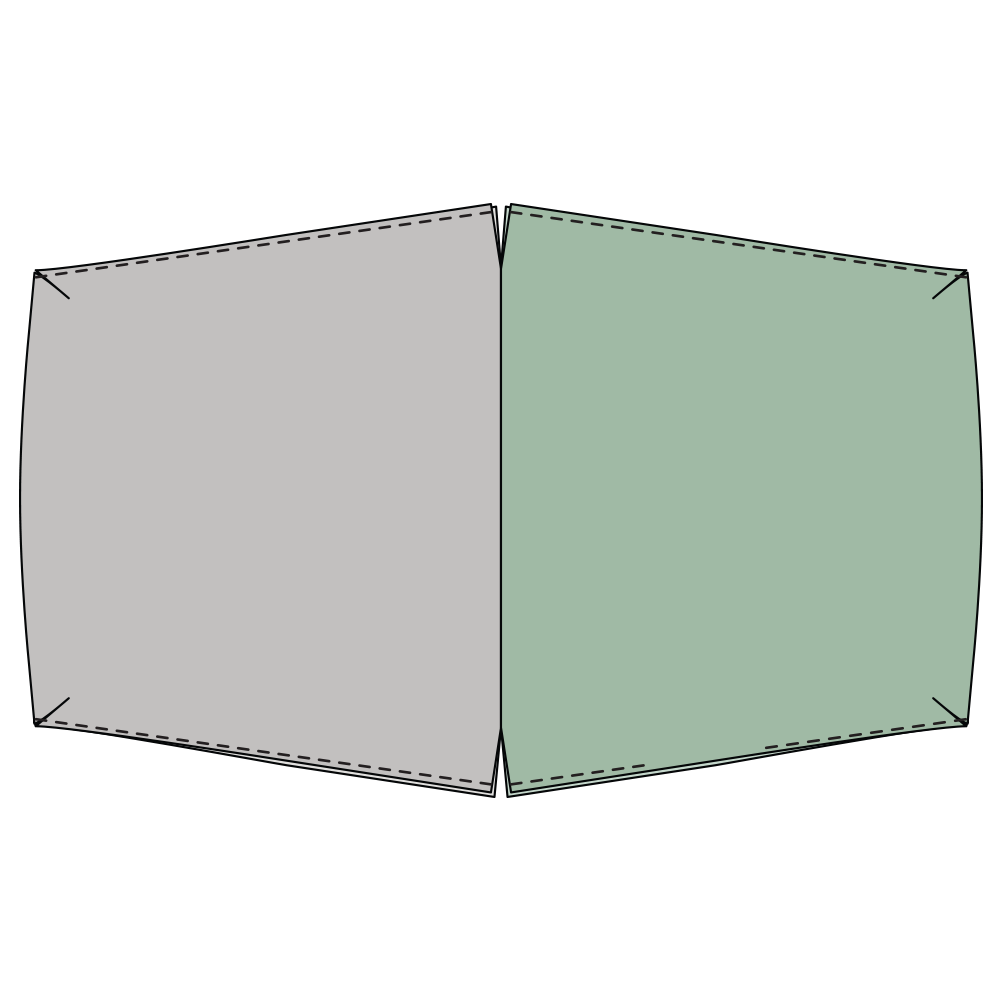
To get started on making your own shopper bag, gather all the necessary supplies: your chosen woven fabric (such as canvas or faux leather), matching lining fabric, a zipper, and fusible interfacing. Then, print out the knot bag PDF sewing pattern and cut out all the necessary pieces.
Next, follow the step-by-step instructions to create the body of the bag, including adding the zipper closure and the knot handle. Be sure to take your time and carefully sew each piece together, ensuring that everything is lined up and securely attached.
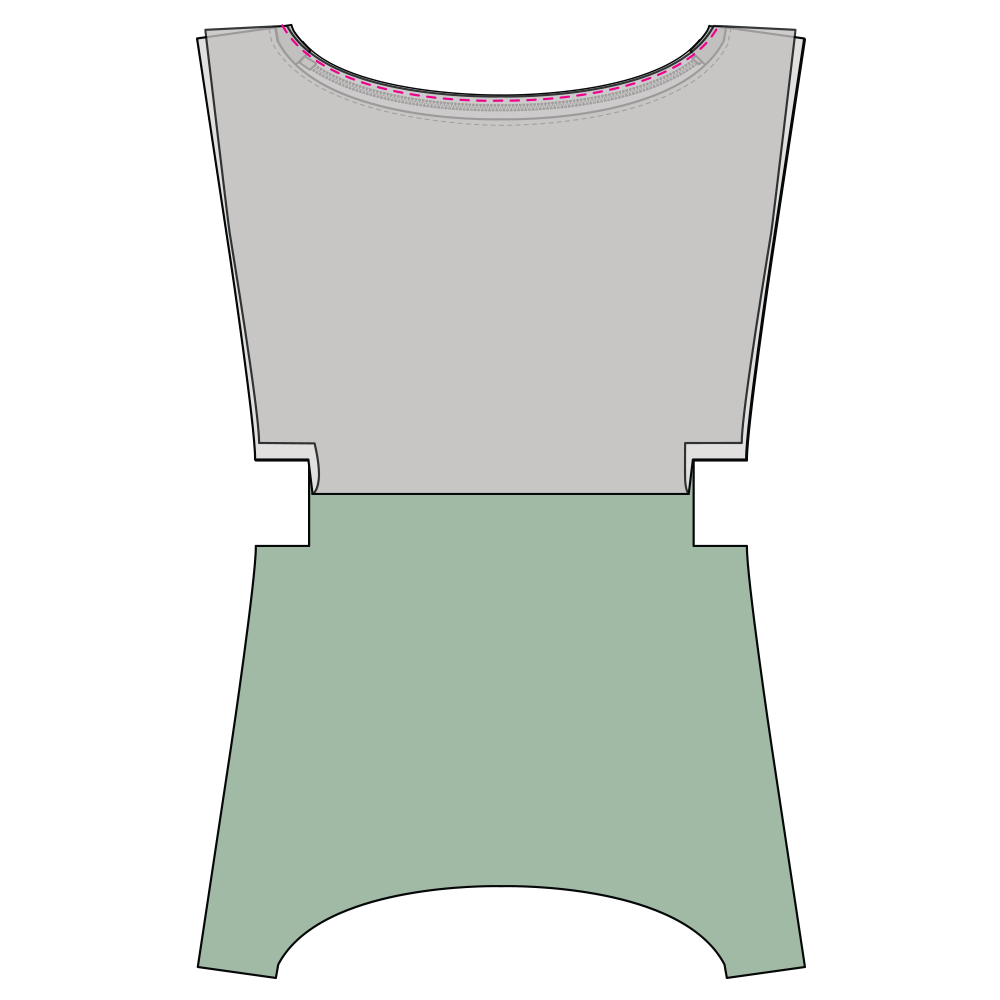
1. Prepare pocket
We start by sewing a small pocket for your phone or keys:
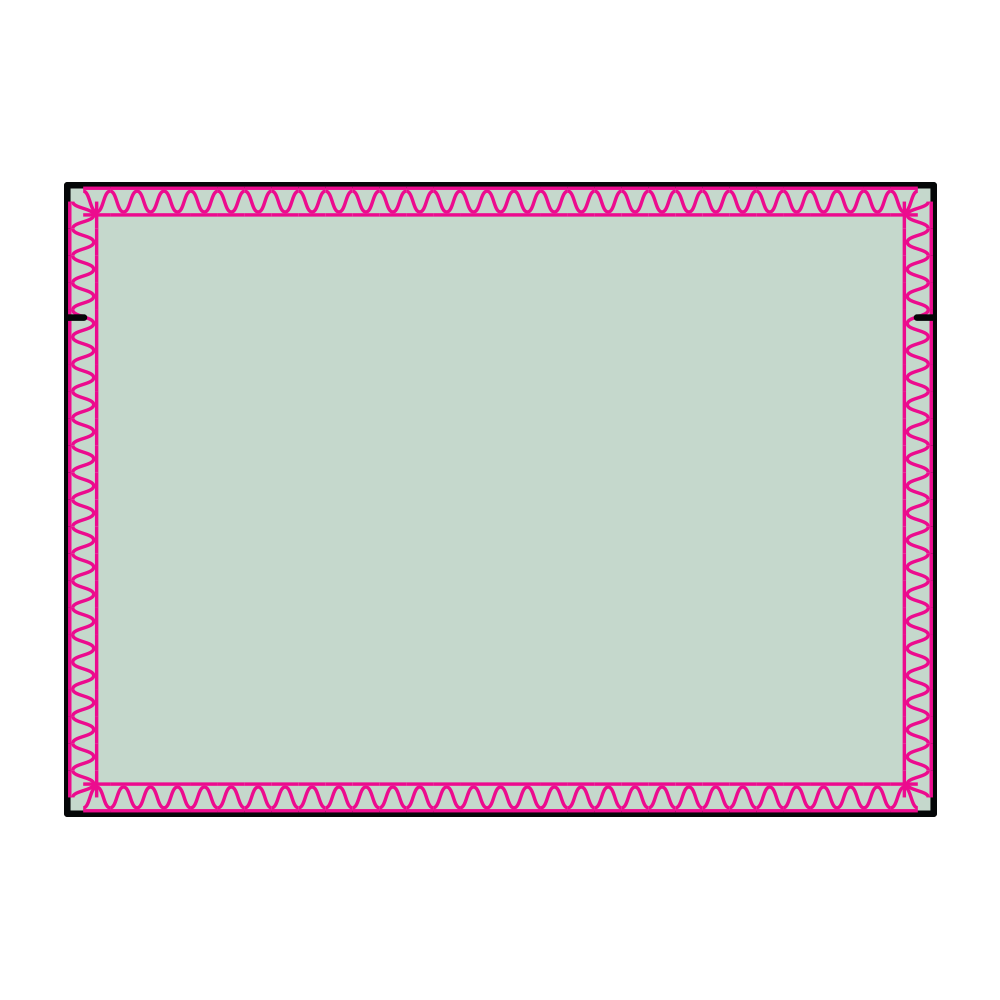
- 1.1.Zigzag the pocket all around (option to use your overlock / serger)
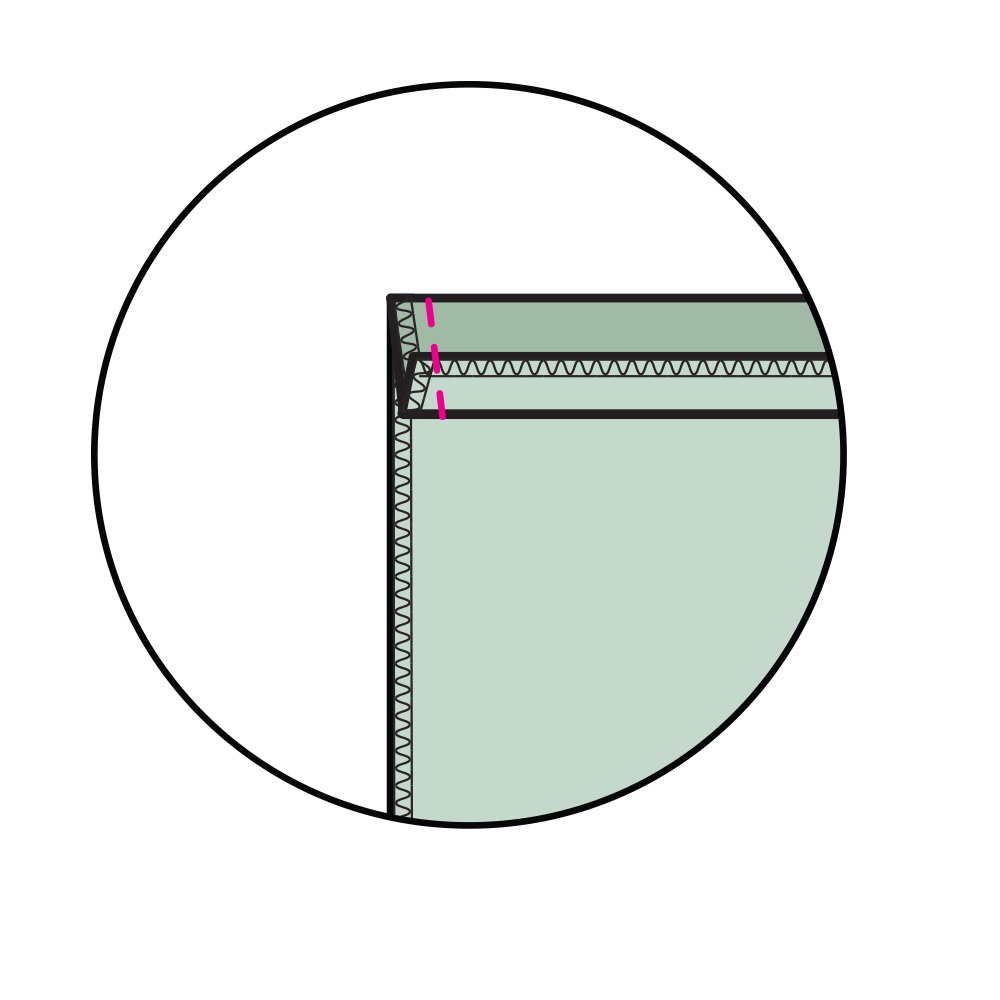
- 1.2. Press the upper edge right sides together on the notch. Stitch the short sides.
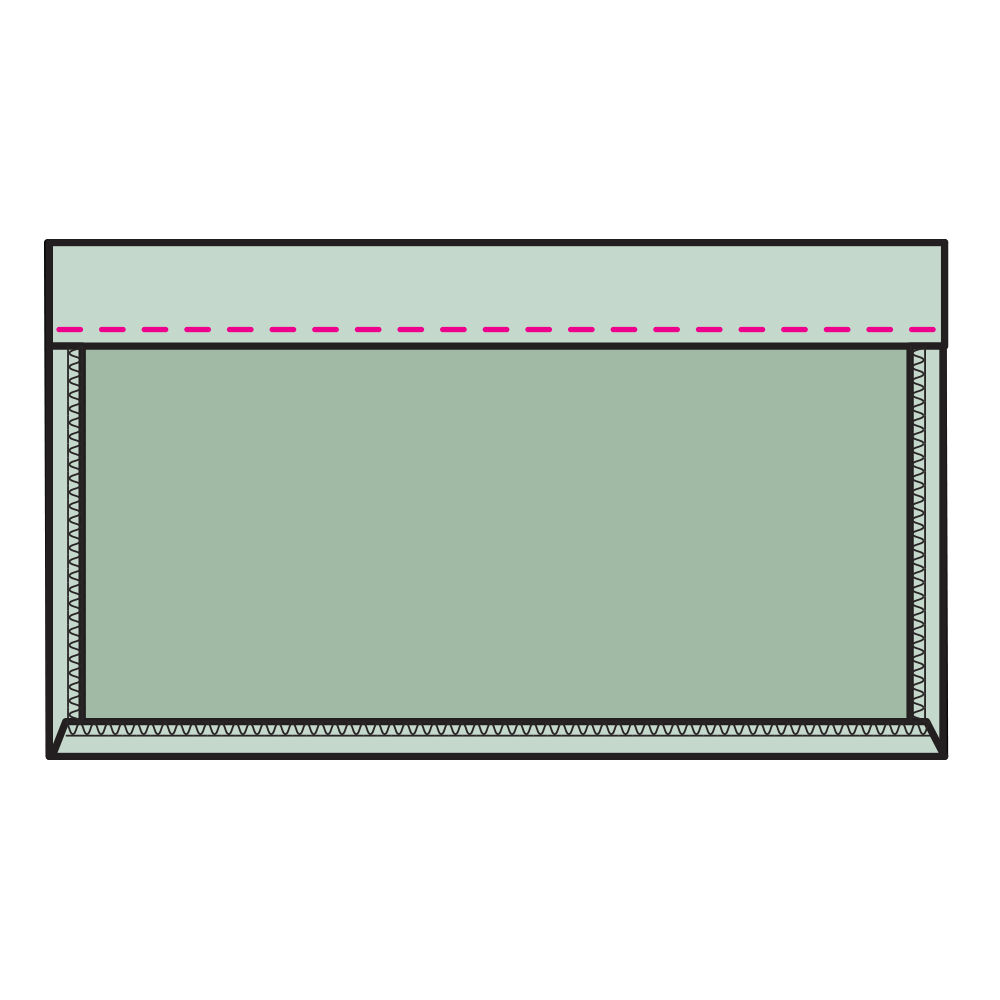
- 1.3.Turn the pocket right side out and topstitch the upper edge.
- 1.4. Press all three edges 1 cm inwards (left sides together).

- 1.5.Topstitch the pocket onto the right side of your lining. Use the pattern for the right positioning of the pocket.
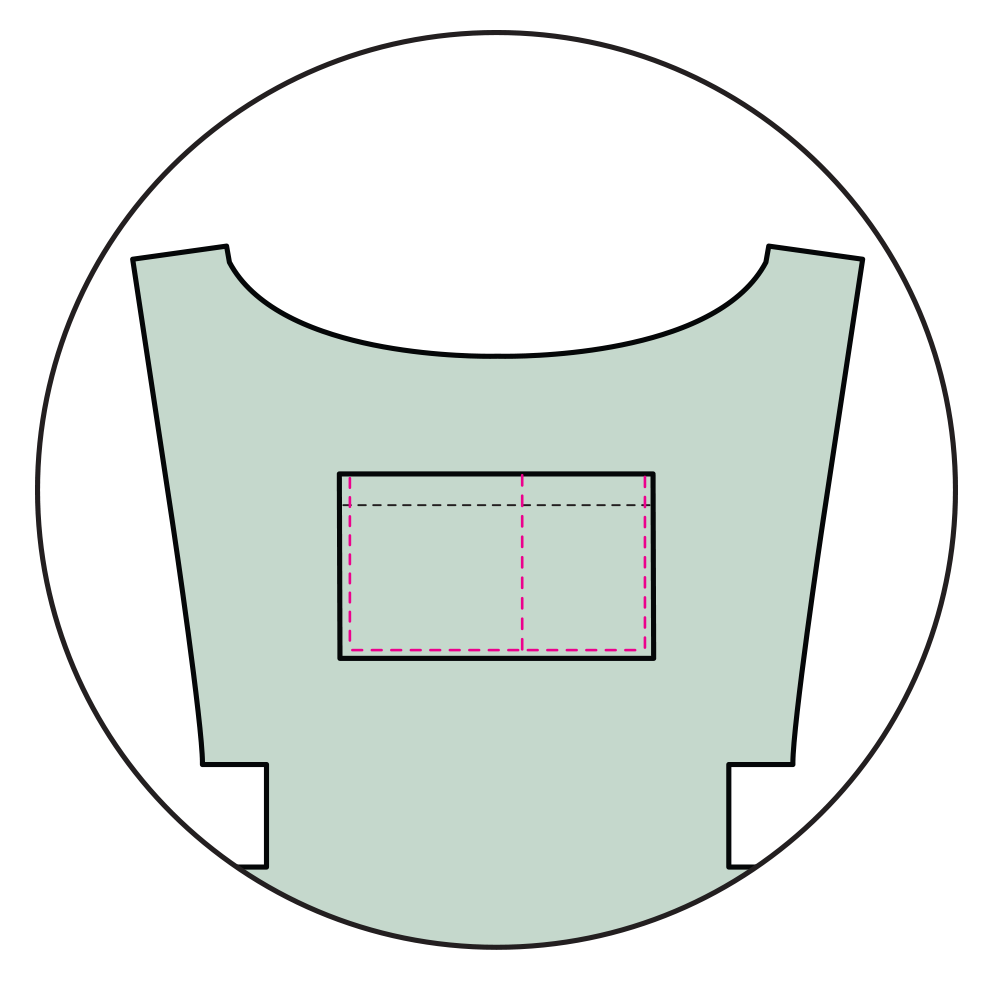
- 1.6. Optional: Topstitch the center of the pocket or the width of your phone so it fits perfectly into the pocket.
2. How to sew the bag zipper
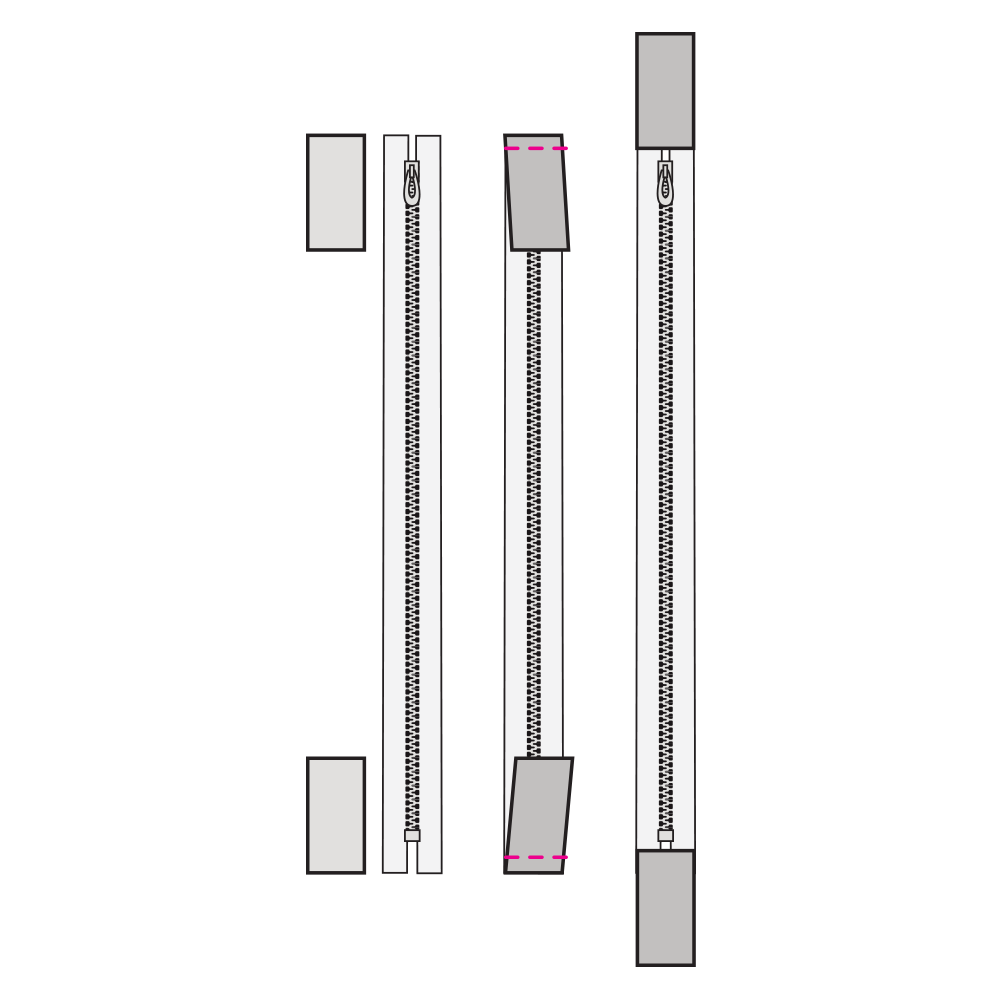
2.1. Place the small zipper ends (right sides together) onto the zipper and attach it with some stitches. If youre using a polyester / nylon zipper, you can just sew over it. If you’re using a metal zipper just sew some stitches left and right from the metal teeth.
(3-5 stitches are enough as we will properly attach it in the next step)
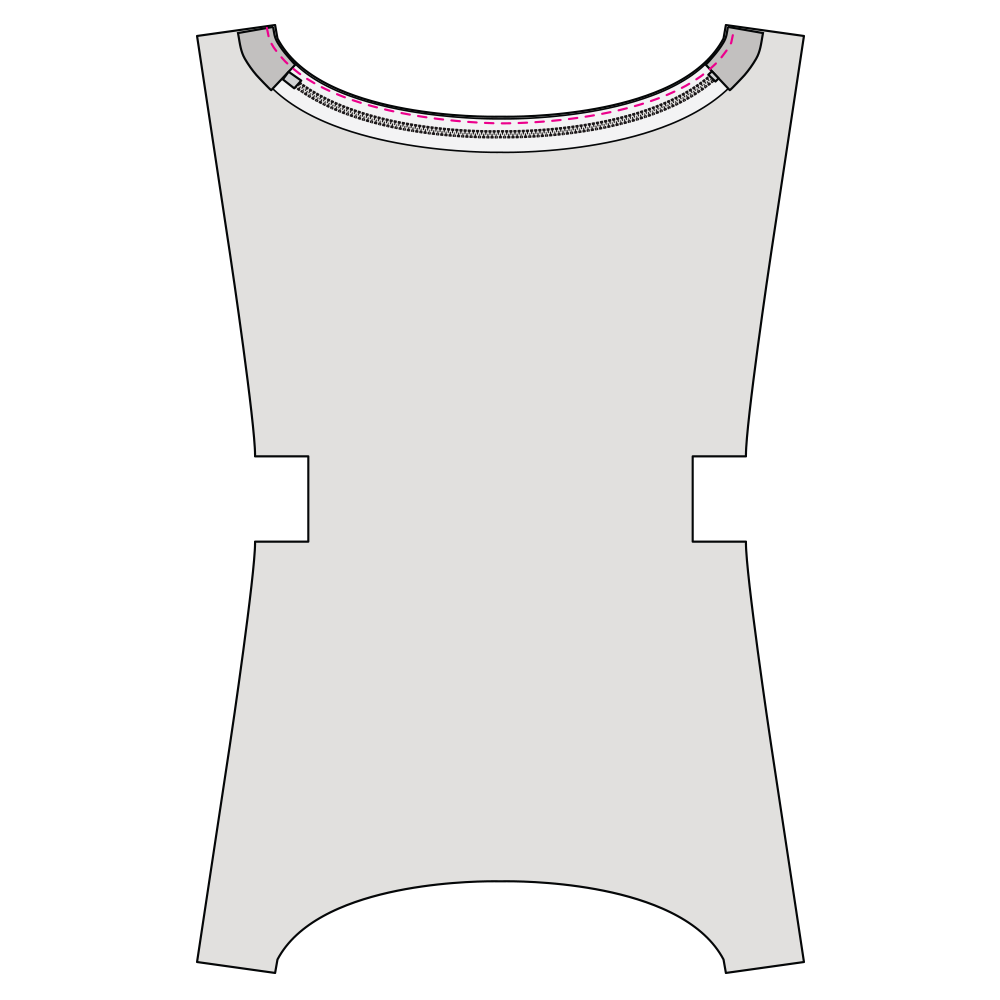
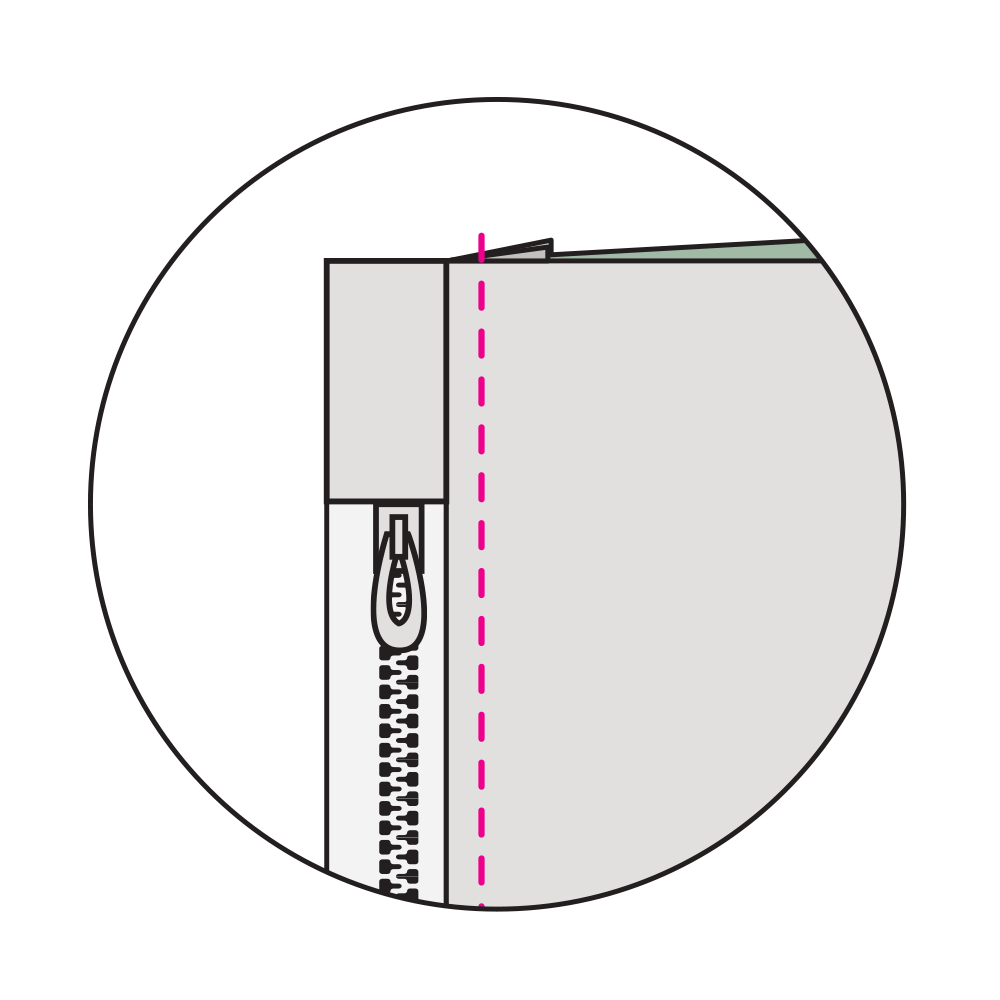
3. Place the zipper right sides onto the main fabric. The notches mark the beginning and end of the zipper. Stitch with a straight stitch. Once you have reached the slider: stop sewing, leave the needle in the fabric, lift the foot, carefully close / open the zipper and continue sewing.
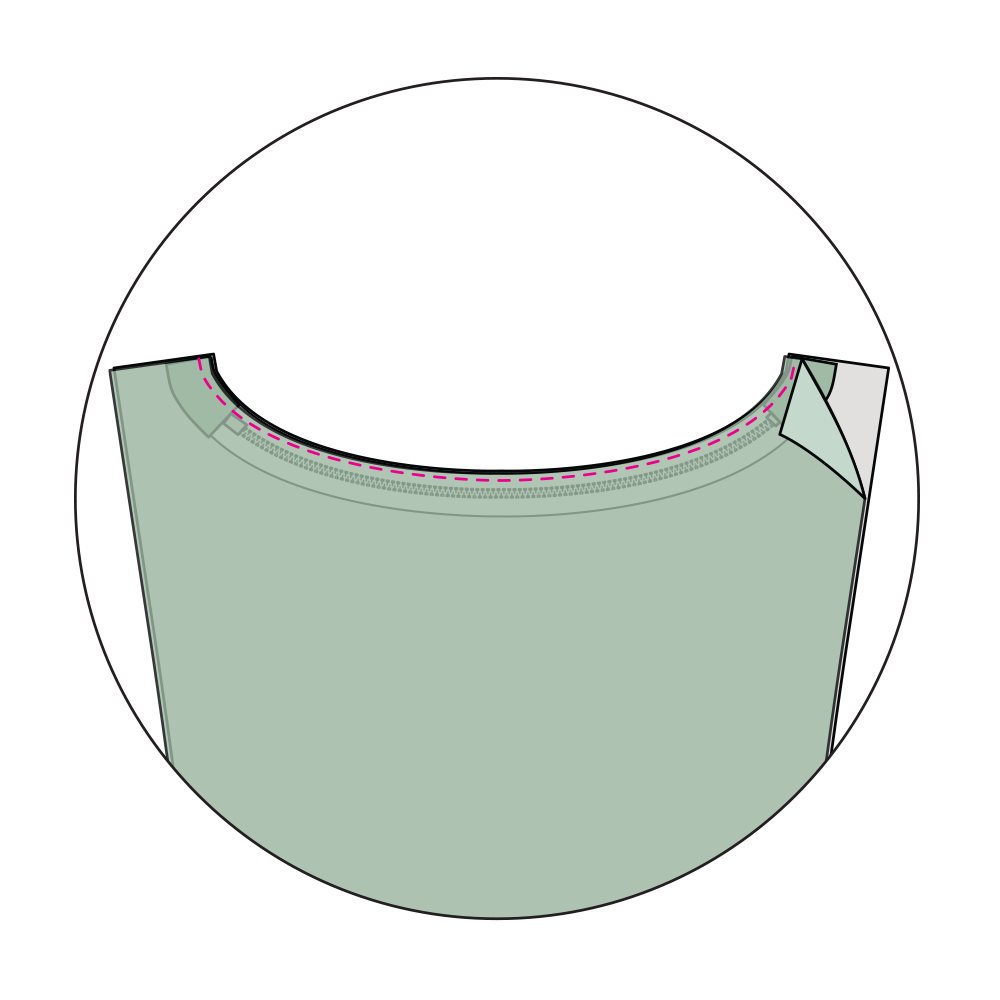
4.Place the lining right sides together onto the main fabric. The zipper is in between the two layers. Stitch exactly over the previous seam.
5. Fold the bag right sides out and iron the fabric away from the zipper. Topstitch the lining and main fabric together.
6. Repeat step 3-5 for the other side:

- 6.1. Turn the bag left sides out. Stitch the main fabric right sides together on the other side of the zipper.
- 6.2. Stitch the lining right sides together on the other side of the zipper. Again, stitch exactly over the previous seam (step 6.1).
- 6.3. Fold the bag right side out and topstitch the main fabric and lining close to the zipper.
-
7. From left side: close all four sides of the bag. Leave an opening in the lining to later on fold the bag right side out.
Important: only close the sides of the bag, not the small openings next to the zipper.
8. Close the four open squares of the bag: right sides together with a straight stitch.

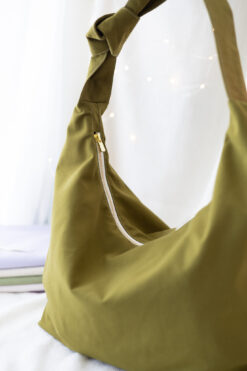
9. How to Add a Knotted Handle to Your Shopper Bag
9.1. Stitch the strap lengthwise, right sides together.
9.2. Fold right side out and press flat.
9.3. Optional: add a knot to your strap.

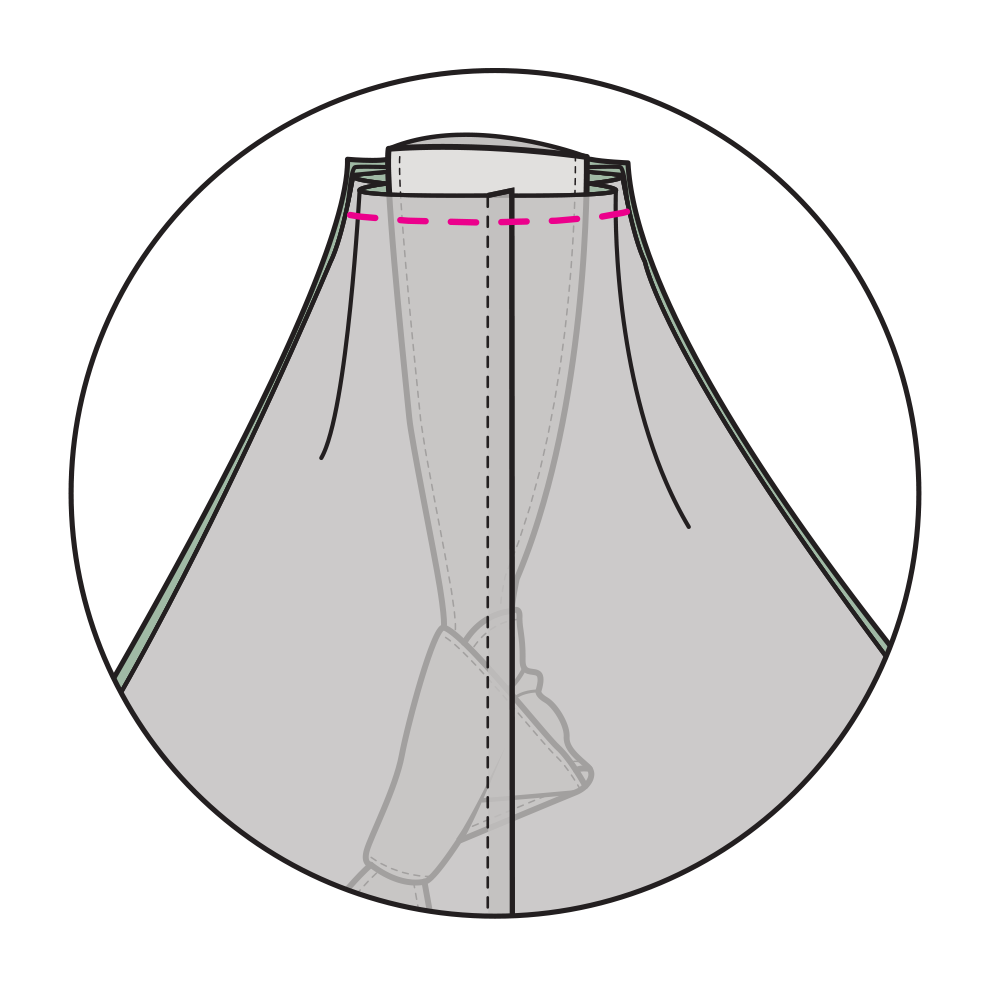
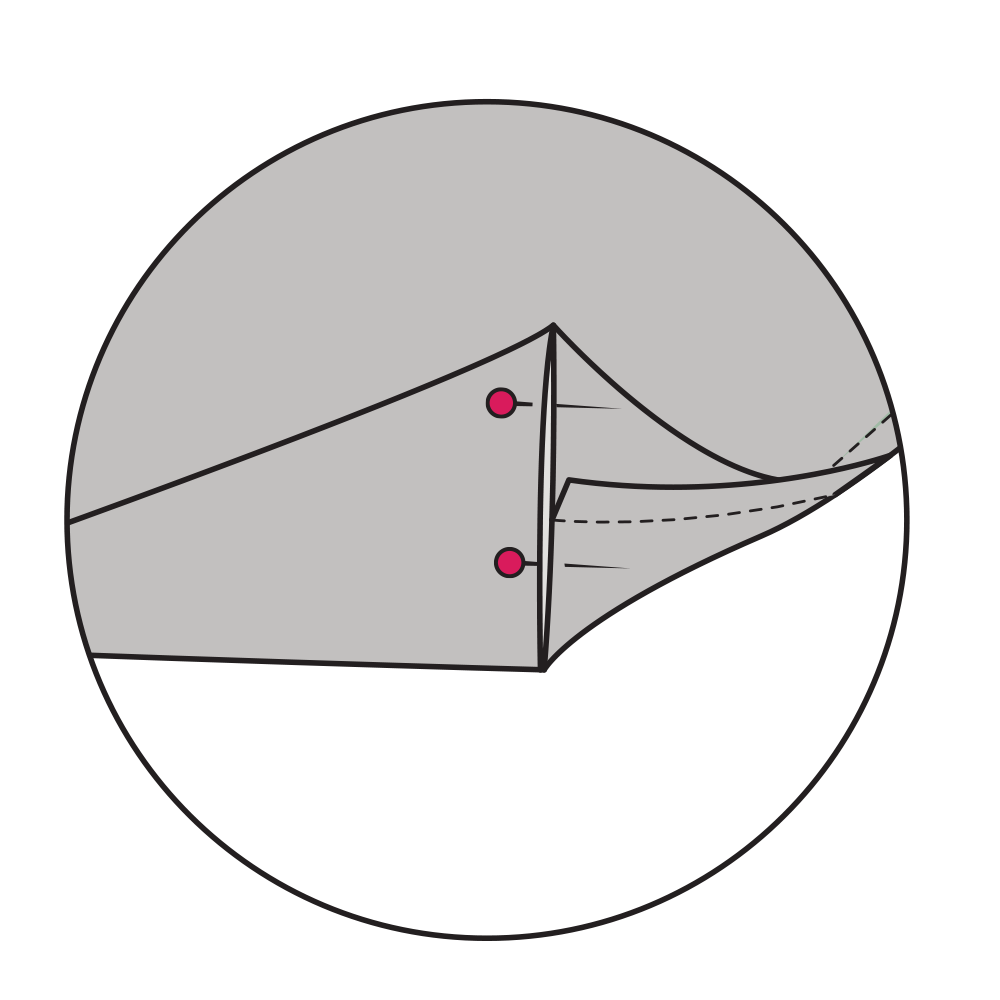
Schritt 10: You should see two openings next to each side of the zipper. Insert the strap into the opening of the main fabric.
Fold the main fabric and lining neatly around the inserted end of the strap. Stitch through five layers: main fabric, strap, main fabric, lining, lining.
As this is a stress point of the bag and possibly needs to hold a lot of weight, make sure to secure this seam well.
11. Repeat step 12 for the other side. Grab the strap through the opening of your lining (make sure its not twisted) and insert it from the inside of your bag through the other opening of the main fabric next to the zipper. Stitch with a straight stitch.
12. Fold the bag right side out. Once you’re happy with your bag, close the opening of the lining with a narrow topstitch.
YAY, You’re done!
DIY Shopper Bag Tutorial
This shopper bag is a versatile and practical accessory that you can easily make yourself with the right supplies- even as a beginner! With our step-by-step guide, you can create a beautiful and functional shopper bag that fits all your needs, whether it’s for work, shopping, or everyday use. Don’t forget to personalize it with your favorite fabrics and finishing touches. I hope this tutorial has inspired you to create your own DIY shopper bag and show off your unique style. Grab your PDF sewing pattern and get started on making your own handbag today!
Make sure to tag me on your creations on Instagram, TikTok or YouTube @makeityoursthelabel / #makeityoursthelabel
PIN IT! Shopper Bag Pattern
Don’t forget to save this post to Pinterest so you can easily come back to it later for reference or inspiration. Simply hover over any image in this post and click the “Save” button that appears. Thank you for reading!
Browse Sewing Ideas
DIY Small Zipper Pouch – Free PDF Sewing Pattern
Download the free beginner pattern for this easy zipper coin purse.
Jan

Cozy & warm: hot water bottle cover as a waist belt
Learn how to make a hot water bottle cover as a waist belt. The perfect [...]
Nov

Easy cosmetic bag free sewing pattern and tutorial for beginners
Learn how to make this makeup pouch. Download the free sewing pattern to sew this [...]
Dec