

DIY nähen, Sewing, Sewing Tutorials
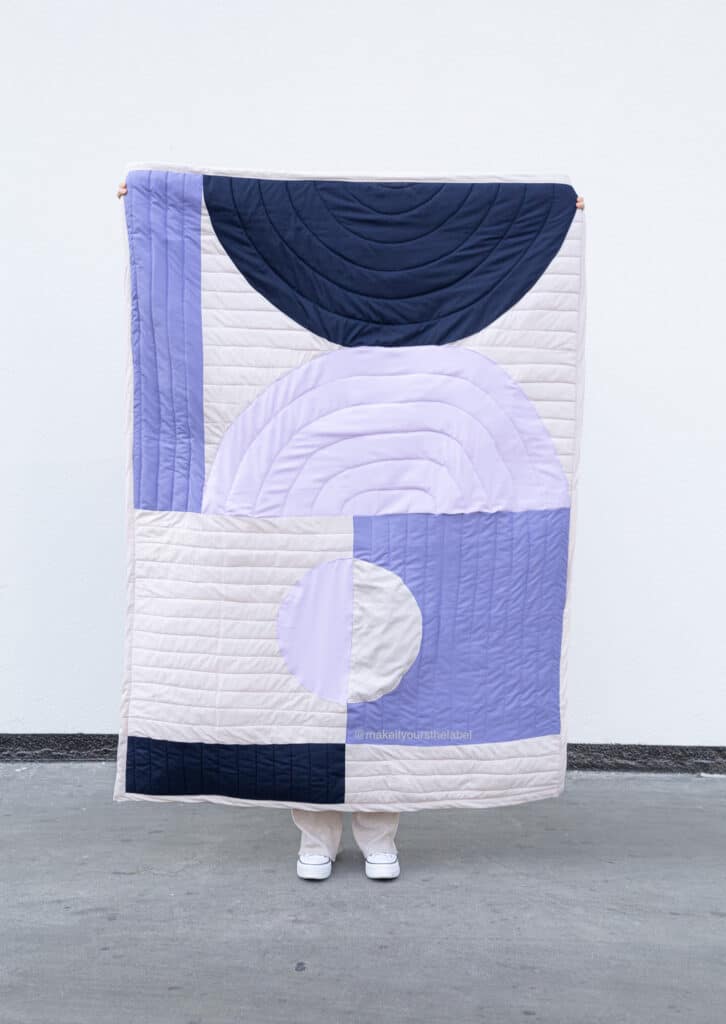
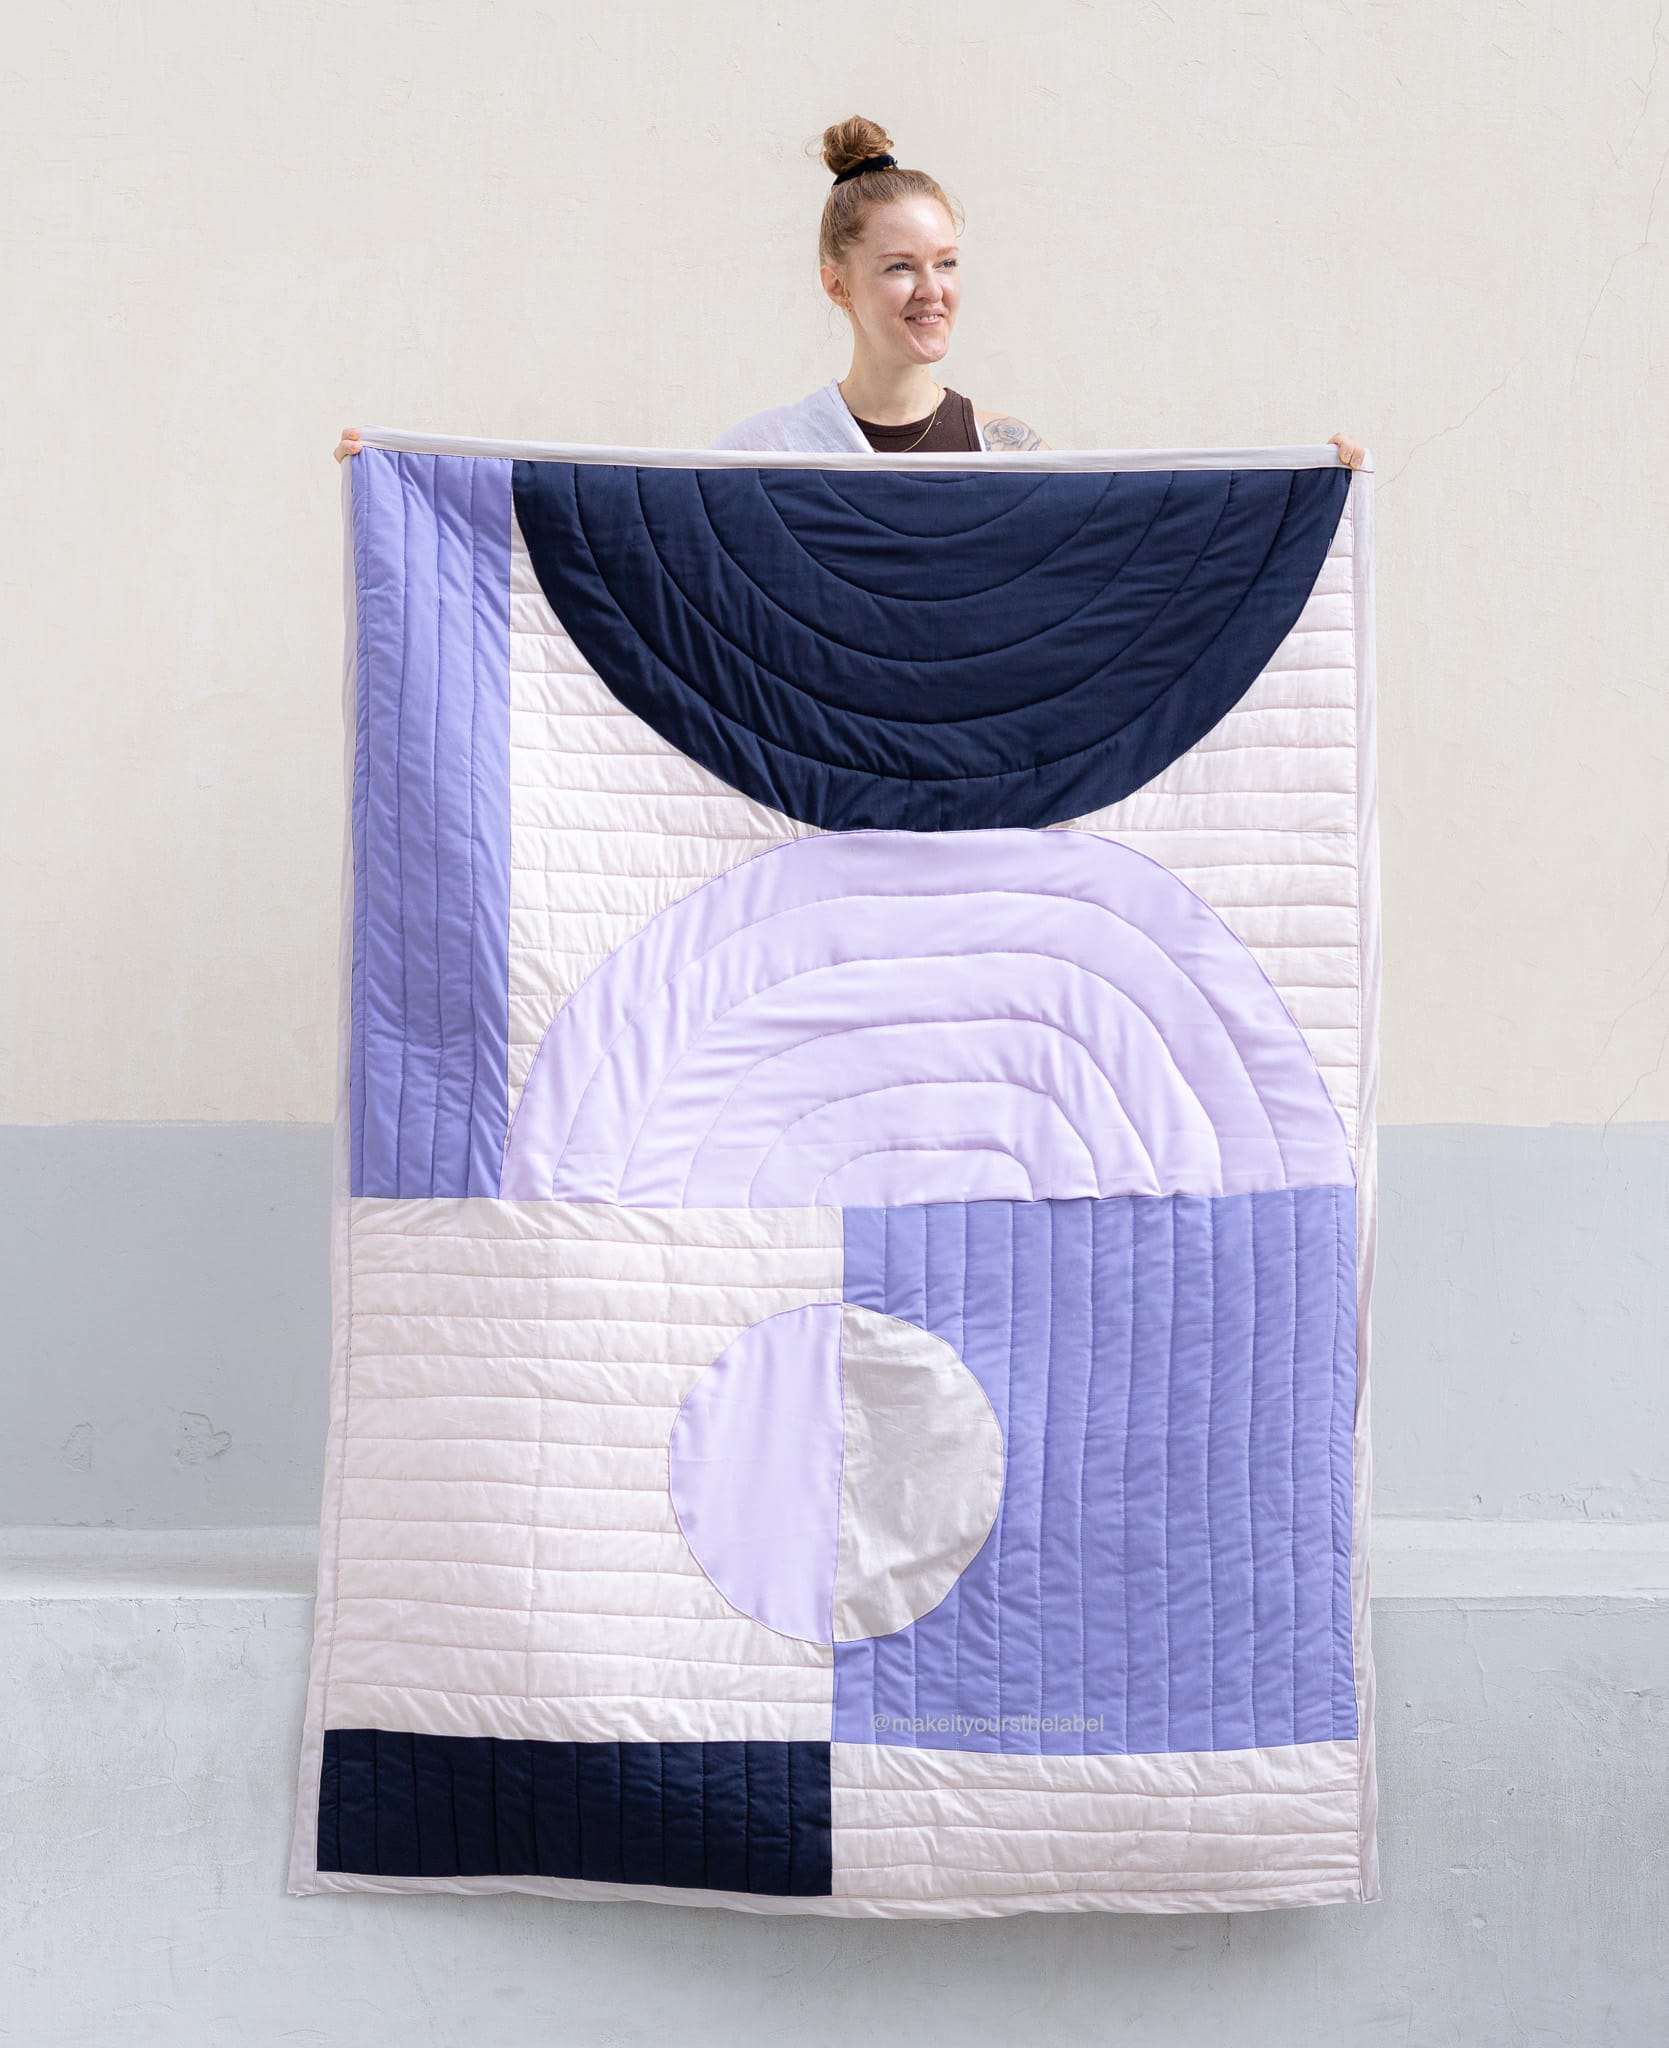
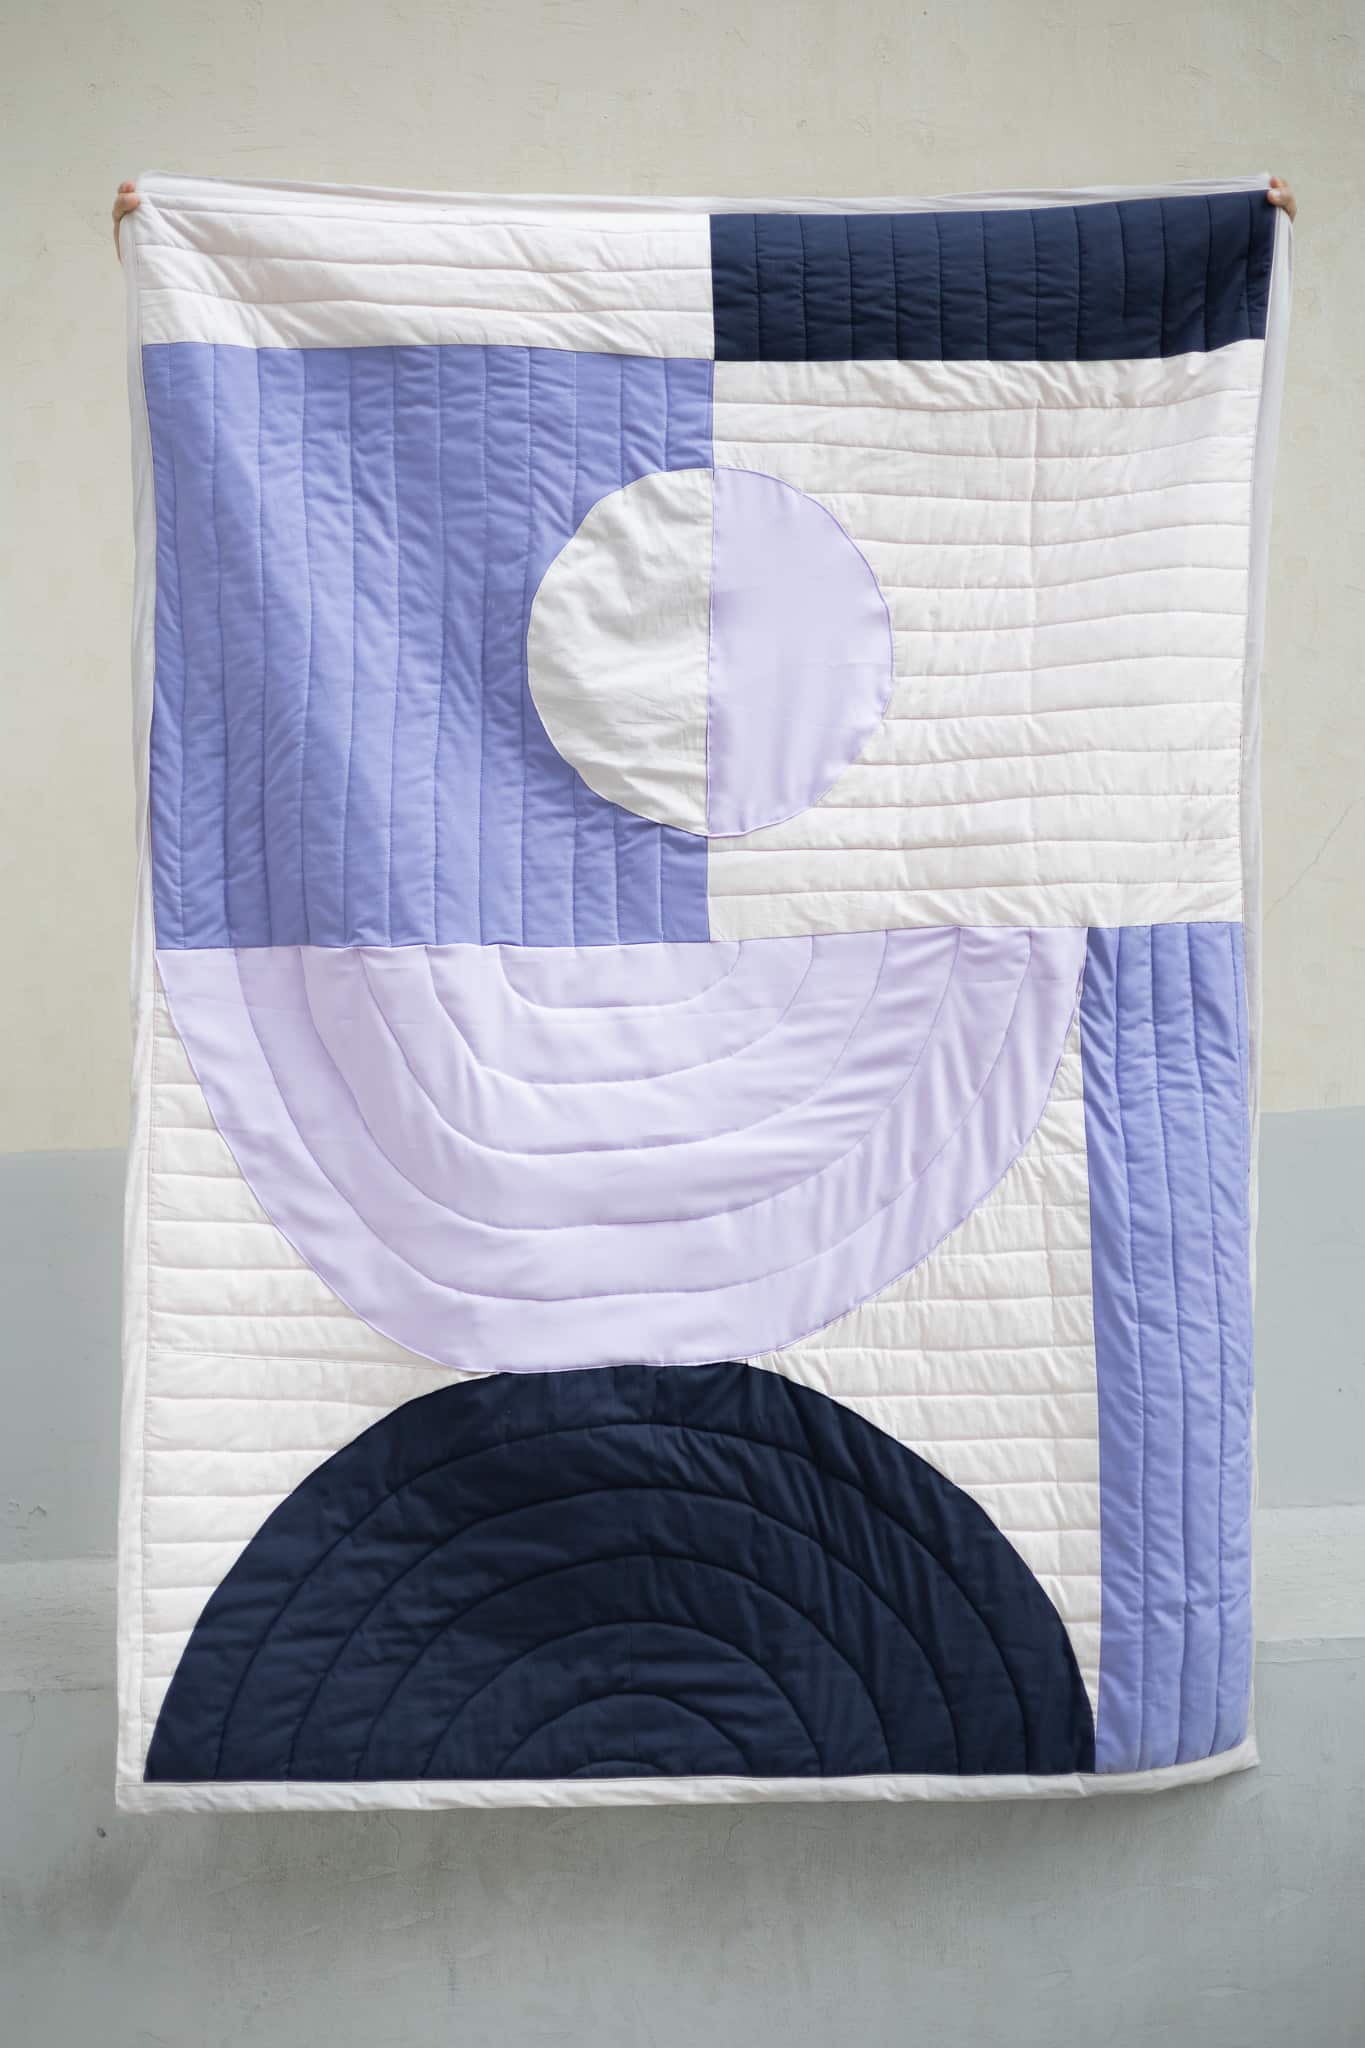
DIY Large Quilted Wall Art Free Pattern
Since we have moved to Dubai I have made it a mission to only decorate the apartment with items I really love! Handmade wall art either bought from independent artists in the UAE or wall hanger I made myself.
For the large empty wall in my office I was determined to create my own quilted wall art, ideally by making use of my fabric scraps. Patchwork is a great way to make use of fabric scraps of any size.
Spoiler: I upcycled some old fabrics and used some scraps for this quilt. But eventually I had to purchase new fabrics as the consumption for the base and the back (yes, you have to calculate a lot of fabric for the back of your masterpiece) was too high.
While the patchwork and quilting process was actually pretty straight forward, the design of my wall art quilt was my biggest challenge. It took me two days of designing and three failed trial to come up with this abstract yet modern quilt pattern (I know it sounds ridiculously long but I wanted to be sure its exactly what I wanted).
In this post I’ll share with you the free quilt pattern and the exact measurements of this large quilted wall hanging. Happy quilting!
*This post contains affiliate-links*If you make a purchase using the links included, we may earn commission.
DIY Abstract Wall Quilt – Supplies and Materials
Material
- Cotton fabric* in the color scheme of your choice. I used 4 different colors (sand, navy, jeans and purple)
- Polyester Quilt Batting* or Cotton Quilt Batting* (I’d recommend to go for the cotton batting)
- Thread* matching your fabrics
- Patchwork ruler*
- Optional but helpful: a rotary cutter*
- Tailor’s chalk* or trick marker*
- Sewing Pins* or Clips*
- Optional but very helpful: walking foot /dual-feed foot* for your sewing machine
Fabric Consumption for this large scale quilted wall hanging
For this quilted wall art I used four different fabrics. I tried out lots of different fabric qualities but this uni cotton / popeline worked perfectly for me. I combined it with a polyester fabric (here in purple) as I wanted to make use of some of my fabric scraps. If you’re buying new fabrics for your quilt I’d definitely recommend to stick with light 100% cotton.
While you are free to be creative and use as many fabrics and colors as you’d like, here is the fabric consumption for my design:
- Fabric 1 (here in beige / sand) = a total of 3,5 meter for the front, back and the binding
- Fabric 2 (here dark blue) = around 1 meter
- Fabric 3 (here light blue) = around 1 meter
- Fabric 4 (here purple) = around 1 meter
- Batting = around 3 meter (depending on the width of the batting and your art piece)
Before you start: Tips for your wall art quilt
Keep in mind: I’m pretty new to quilting. These are tips from my beginner perspective which helped me to sew this large wall art quilt.
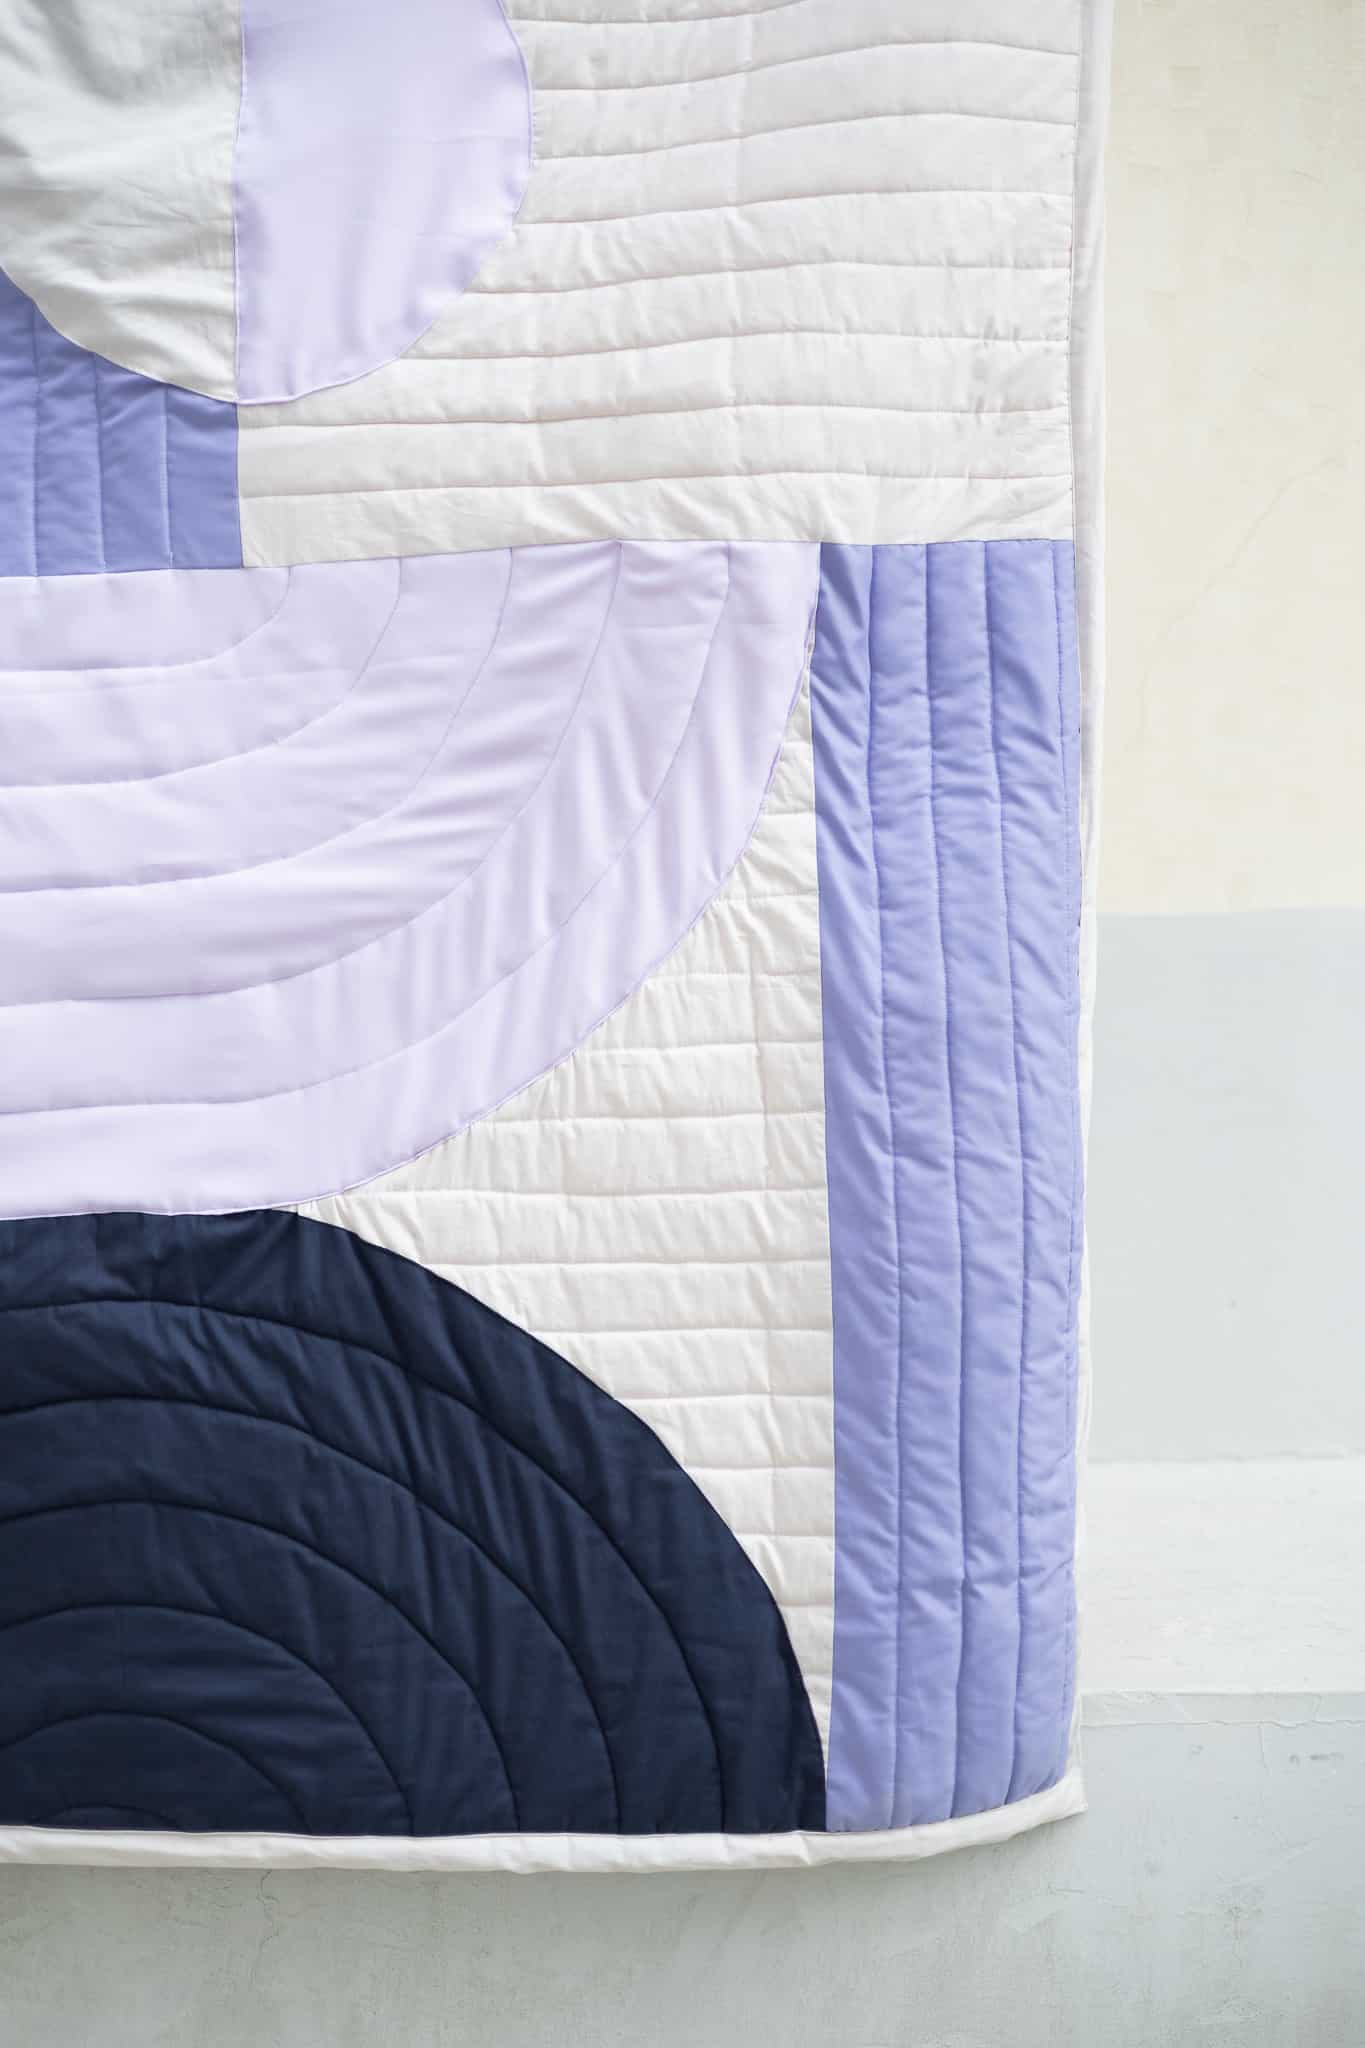
Patchwork describes the process of combining different fabrics to one larger piece. You can create and repeat patterns that add up to a large design. Common designs are mandalas, geometric and abstract shapes. It’s a great method to make use of your fabric scraps.
Quilting is the process of stitching through three layers which usually involves one layer of batting / vieseline and creates a second pattern on top of your patchwork pattern. Quilting usually involves one patchwork layer.
I made this large quilt with my regular sewing machine foot. Generally speaking you can totally sew a wall art quilt using your universal sewing foot.
Personally I noticed, that the batting stretched while quilting the layers. That’s why I’d recommend to invest in a walking foot /dual-feed foot* for best results. The walking foot is also helpful for other materials that stretch easily such as knits.
Buy walking foot on amazon.aeYou can choose between polyester and cotton batting. Polyester batting is washable, easy to use and budget friendly.
Cotton quilt batting is breathable, washable and more sustainable. Especially when you’re planning to use your Quilt as a blanket or for Babys / kids I’d recommend to go for the natural option of 100% cotton fibers.
For your top layer (the patchwork layer) you can use a standard stitch length of 2.5. Increase your stitch length for the machine topstitching of your quilt. I used the longest stitch length of my sewing machine (5).
Helpful Tip: I sketched out the design on my iPad before I started this project. Once I was happy with the base (here the sand cotton), I drafted the fabrics on top until I committed to a final design and started to cut the fabric.
DIY Quilted Wall Art: Free Quilt Pattern
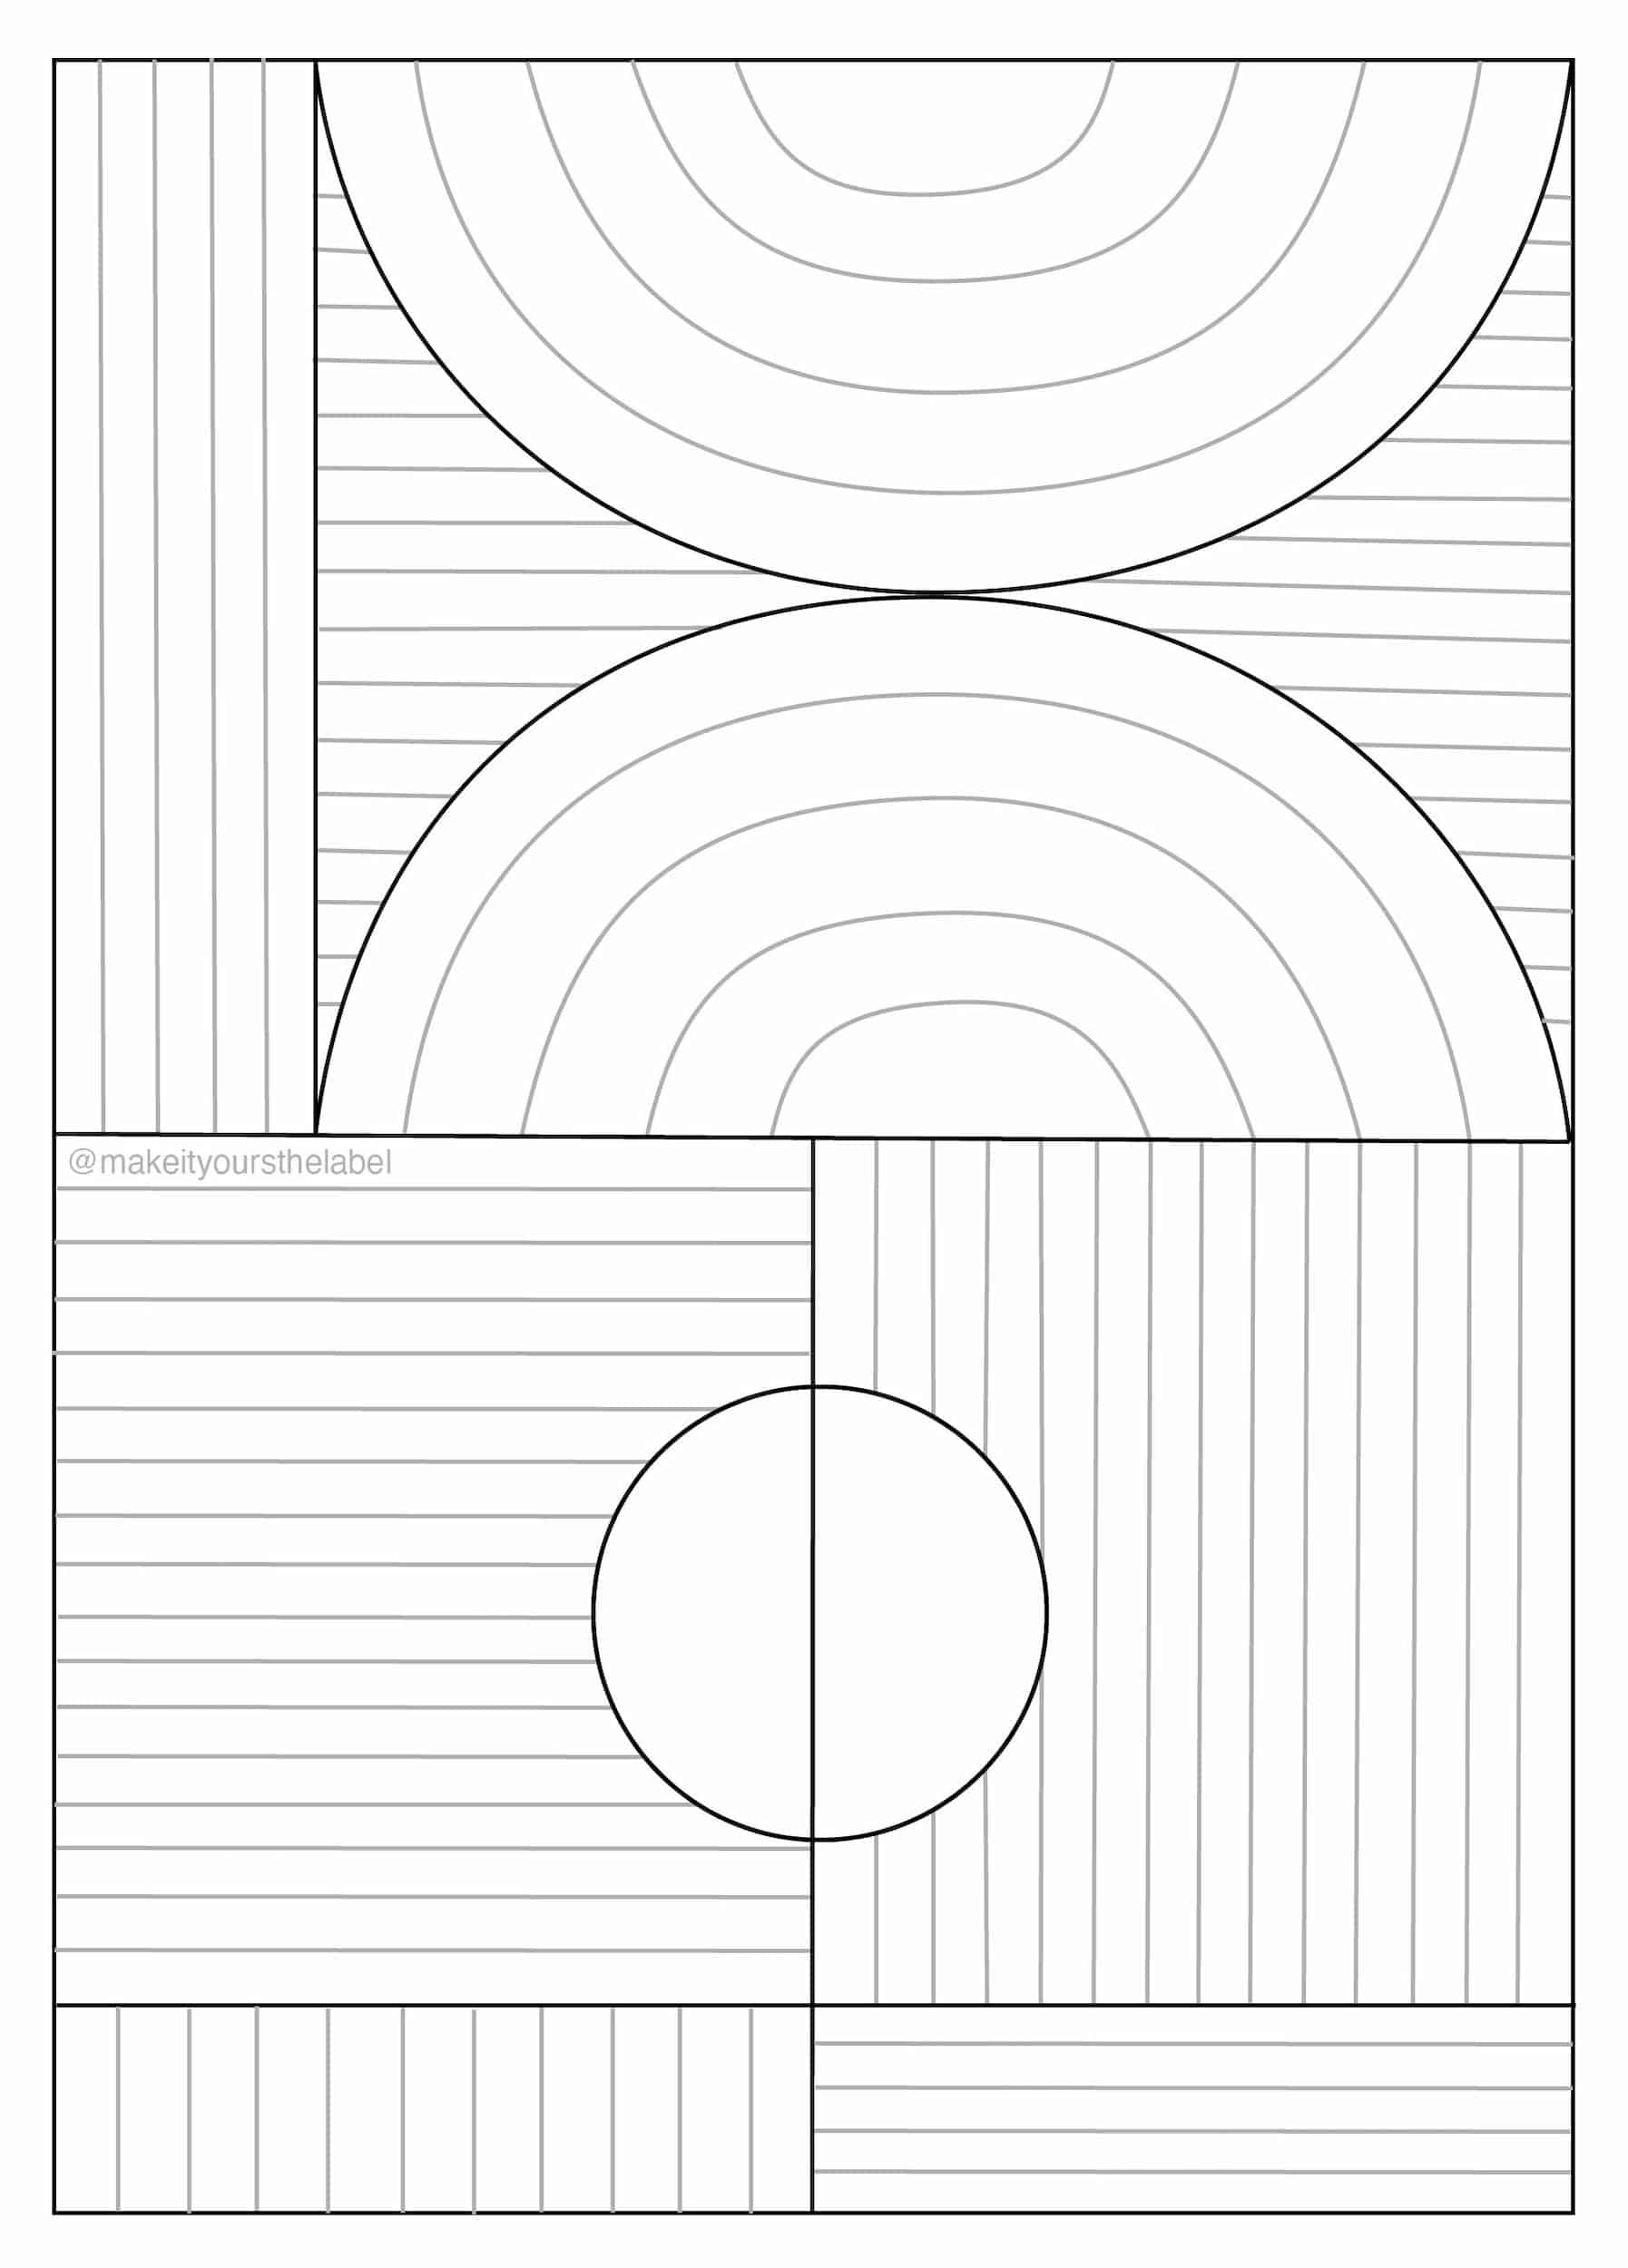
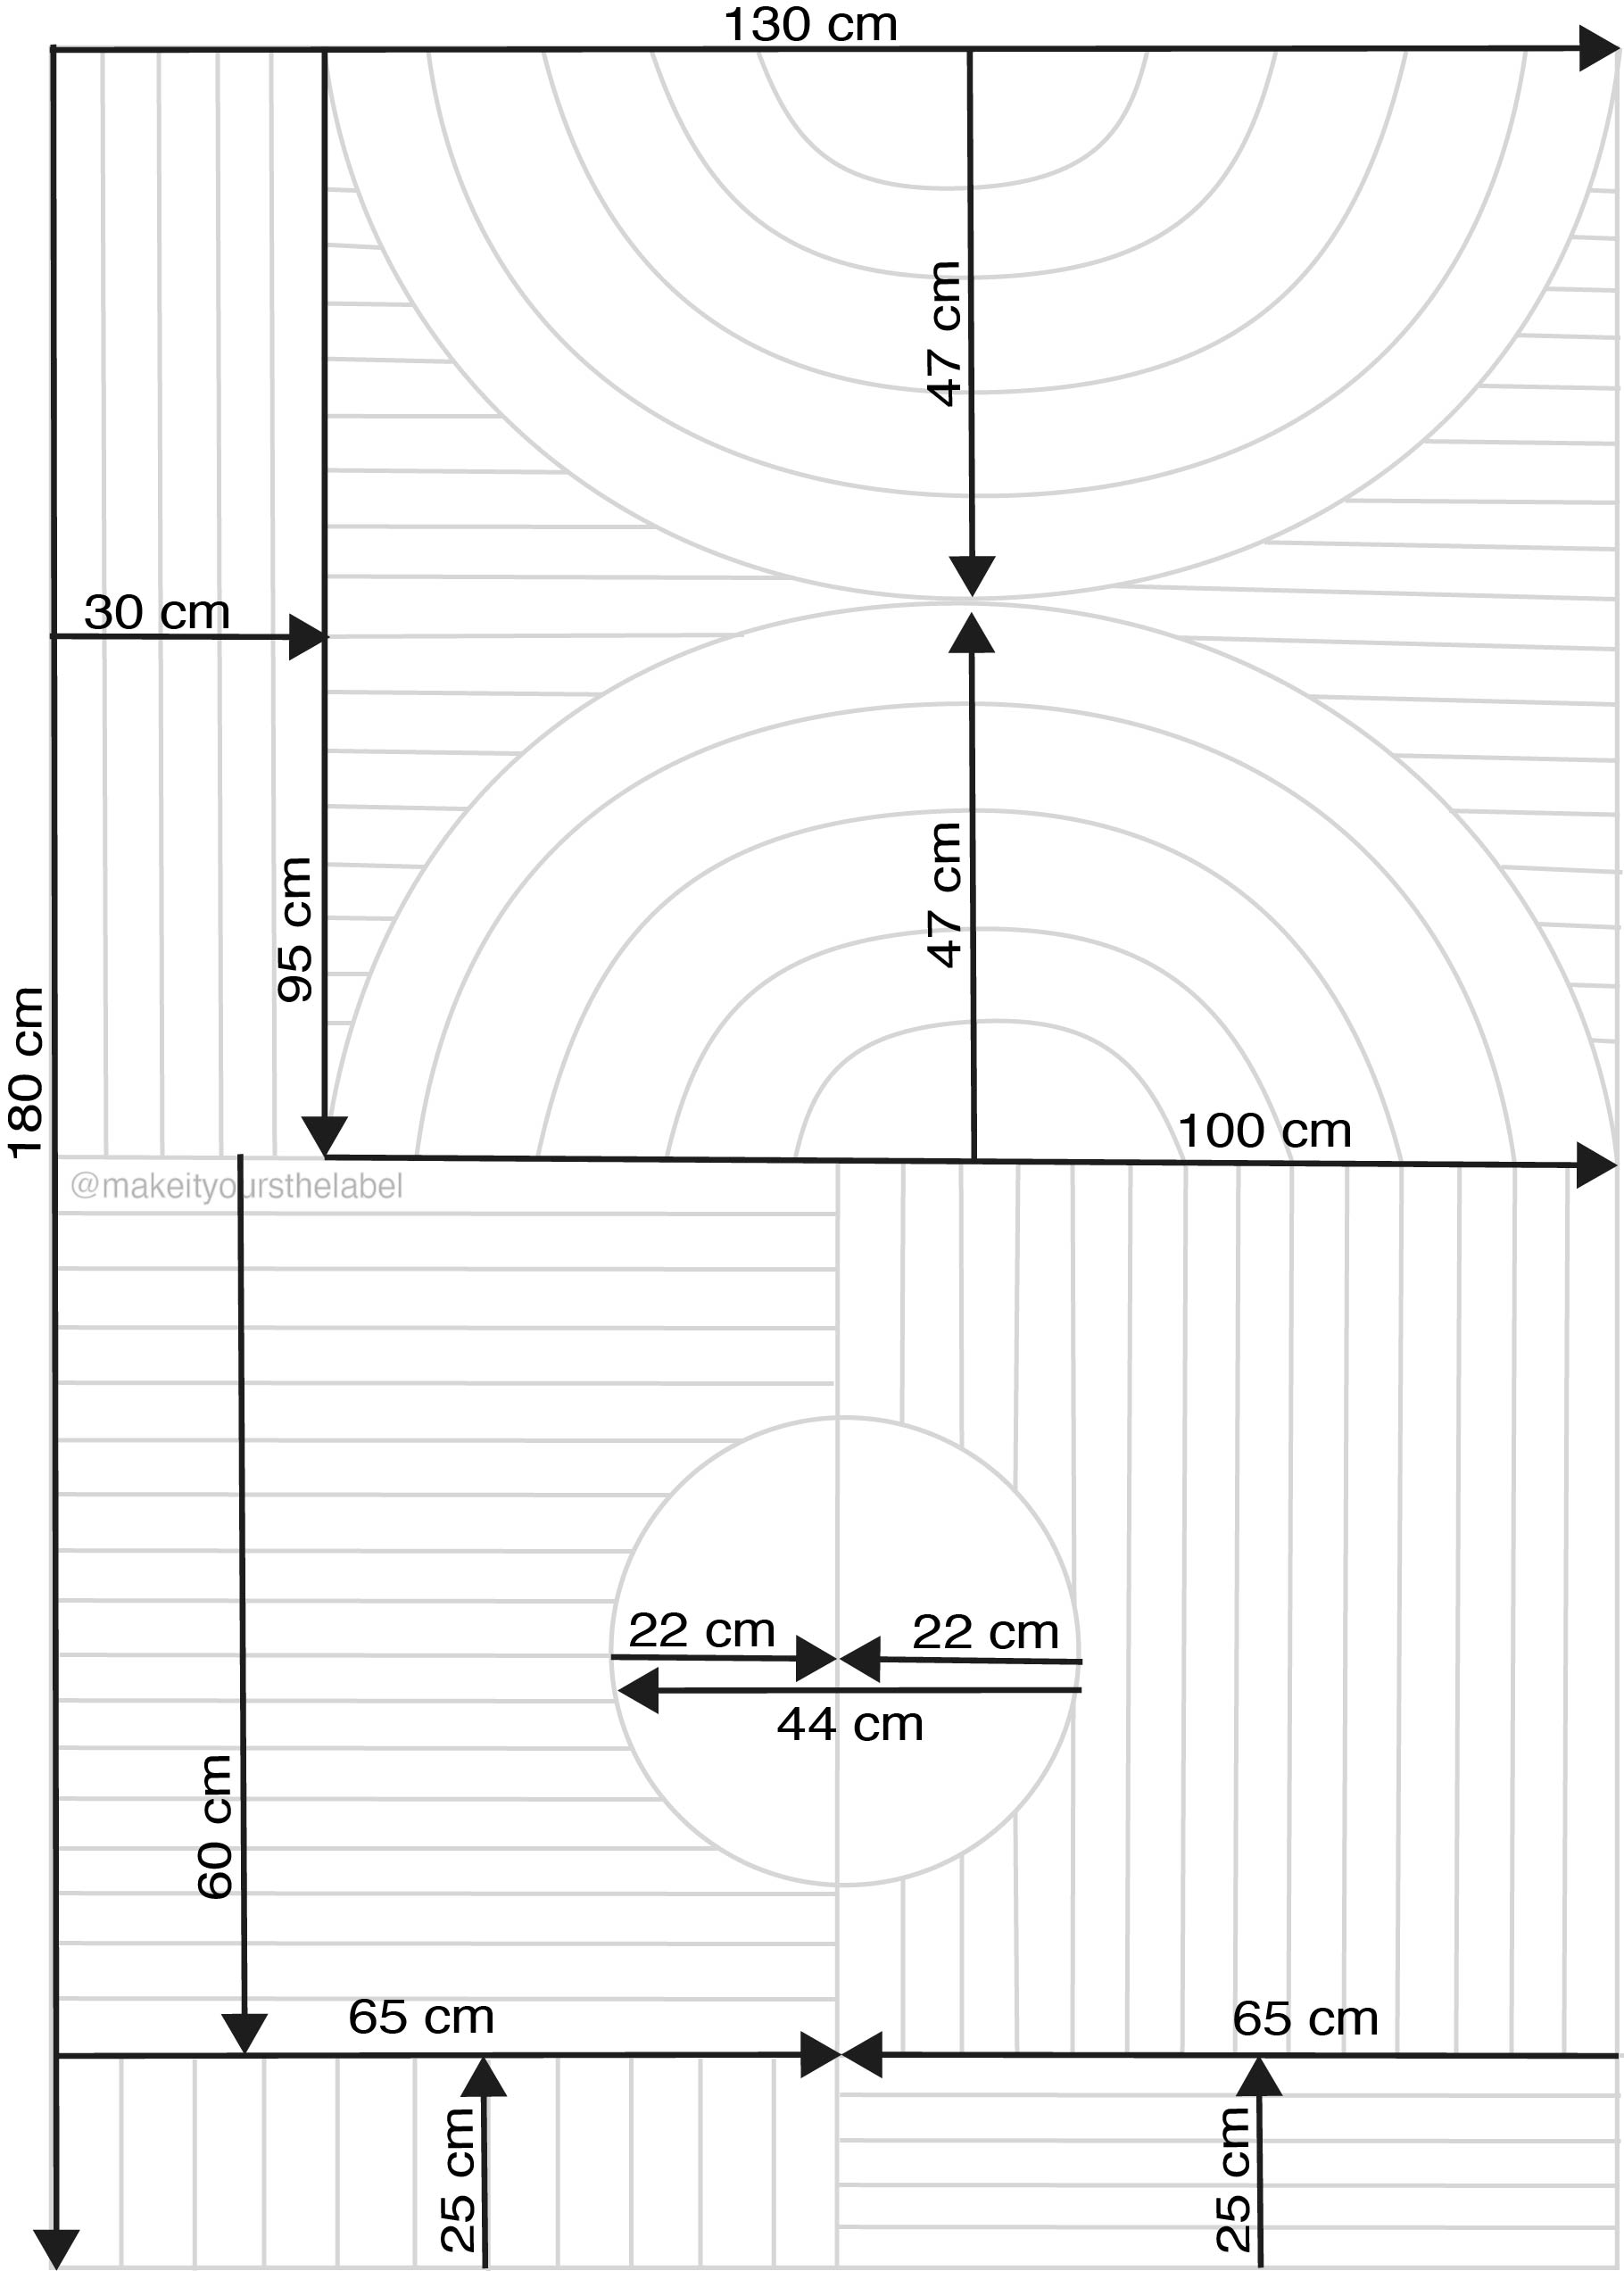
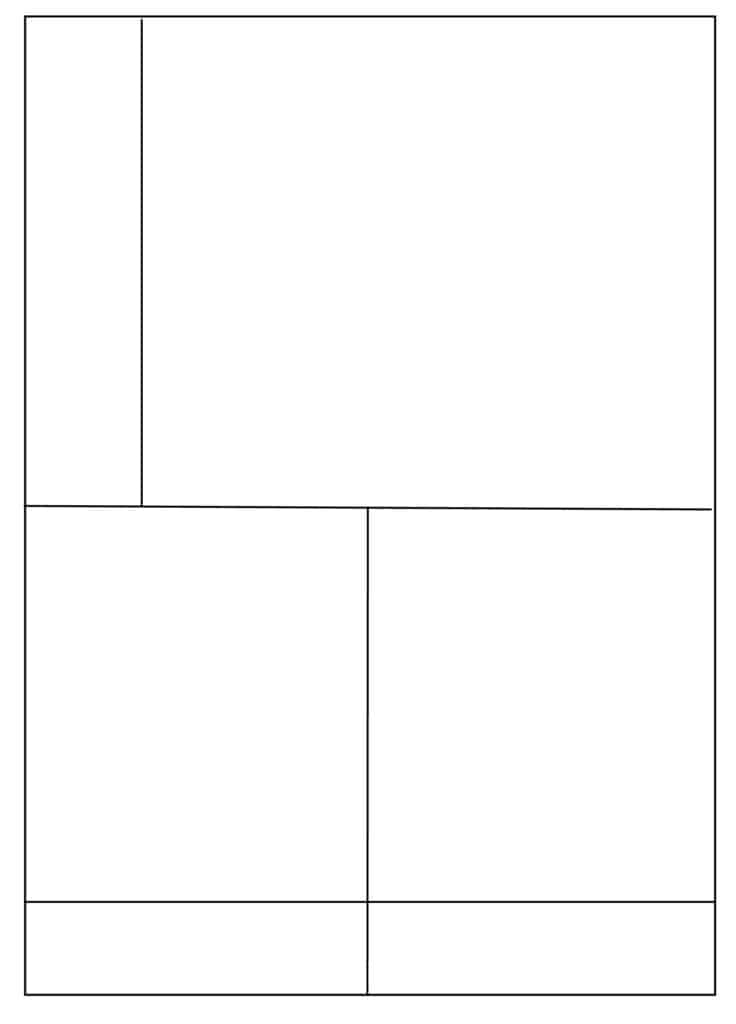
Sewing Wall Art ist a great way to get creative with all your leftover fabrics. You can use fabric scraps, upcycle unloved fabrics / clothes and mix it up with some new fabrics. While the quilting process itself is so much fun and straight forward, it can be challenging to come up with a patchwork pattern. That’s why I’m going to share with you this free quilt pattern as a technical drawing. With the detailed measurements you’ll be able to recreate this patchwork wall hanging at home.
Technical Drawing & Measurements Patchwork Wall Hanging
Tip: download or print the image to plan your project and your color scheme. I personally work with procreate on my iPad.
1 cm seam allowance included!
How to make this wall art quilt – quick tutorial
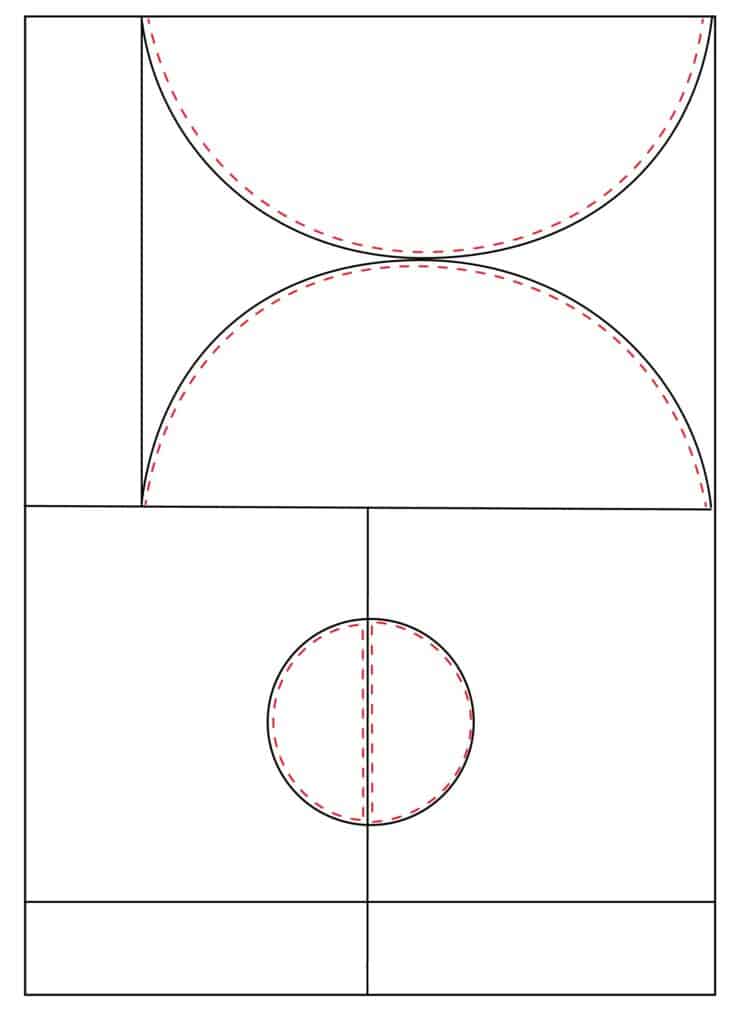
1.Cut all fabrics for the front layer (patchwork layer) according to the pattern (above)
2. Sew all square fabric pieces together according to the pattern. Use one centimeter seam allowance, a straight stitch and a stitch length of 2.5.
3. Add the circles to your patchwork base. Pin and topstitch with a narrow stitch close to the edge. Use a straight stitch and a stitch length of 2.5
4. Press your final patchwork flat, make sure to press all seams to one side (not open)
5. Use Tailor’s chalk* or a trick marker* to mark all quilt lines on the fabric. Take your time for this step and work accurately for best results.

6. Cut the batting to your final patchwork size (here 180 x 130 cm)
7. Cut your the back of your quilt in the fabric of your choice to the final size of the quilt (here 180 x 130 cm)
8. Secure all three layers with pins or clips. Extra tip: I secured on side of my quilt with a large zig-zag-stitch just to make sure it won’t move during the stitching process
9. Start stitching the quilt pattern. Start from the top and work down to the bottom. Work slowly and accurately.
10. Attach the binding to your quilt. For my quilt I prepared 8 cm wide bias tape stripes and attached it all around with one centimeter seam allowance. I attached the binding to the back and topstitched from the front.
YOU ARE DONE!
Summary
DIY Wall Art Quilt
Patchwork and quilting is so much fun and great to get creative with colors, shapes and different fabrics. These are the most important learning from this project:
- If you are not using a quilt pattern, plan and sketch out your design before you start cutting and sewing
- lower the heat of your iron when using polyester batting
- don’t use steam when ironing your layers
- press seams to one side instead of pressing it open
- For patchwork sewing I recommend the standard stitch length of 2.5, for quilting I used the largest stitch length (5) of my sewing machine
- a walking foot /dual-feed foot* is very helpful as it sews all layers evenly and prevents the fabric from puckering or stretching out of shape.
- Stitch / quilt from top to bottom to avoid access fabric bulking
I’d love to hear your feedback in the comments below or say hi on Instagram @makeityoursthelabel.
Browse sewing ideas
DIY Easy Shorts Free Sewing Pattern & Sewing Tutorial
Let's make these easy high waist shorts with elastic waistband. Free Sewing Pattern for instant [...]
Jun
Etsy Gift Ideas for Fluffy Teddy and Sherpa Accessories
Warm, soft and fluffy. Browse through my top Etsy gift ideas for sherpa lovers.
Jul
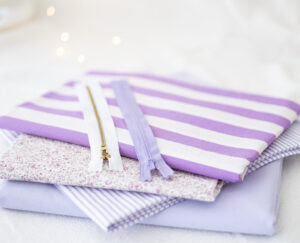
DIY Crossbody Phone Bag From Fabric Scraps – Free Sewing Pattern
Free Sewing Pattern for a stylish crossbody mobile phone case. Easy DIY idea for sewing [...]
1 Comment
Jul
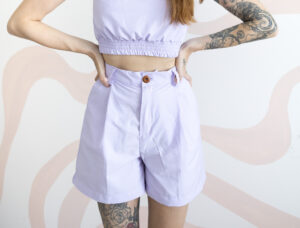
DIY How To Sew These Must-Have Tailored Summer Shorts
Learn how to sew a casual-chic pair of high waist tailored summer shorts with my [...]
May
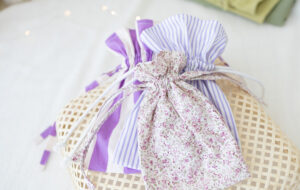
Easy DIY Drawstring Bag from fabric scraps – free sewing pattern
Make this cute drawstring bag from fabric scraps. The free PDF Sewing Pattern and YouTube [...]
Mar
Top 5 Best Fabric Shops In Dubai: Discover high-quality textiles at affordable prices
My top 5 fabric shops in Dubai you HAVE TO VISIT on your next vacation.
7 Comments
Feb

DIY Shopper Bag: make your own zipper tote bag with this easy PDF Sewing Pattern
The perfect everyday, all-day bag pdf sewing pattern! This zipper bag is versatile, trendy and [...]
Feb
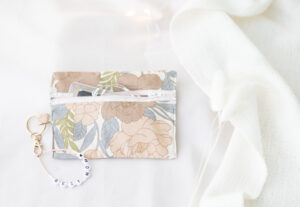
DIY Small Zipper Pouch – Free PDF Sewing Pattern
Download the free beginner pattern for this easy zipper coin purse.
Jan